According to The Chambers English Dictionary, at least in a pre-1970s version, an éclair is “a cake, long in shape but short in duration”. In a standard French dictionary, you’ll find that an éclair is not only a pastry, but also a flash of lightning.
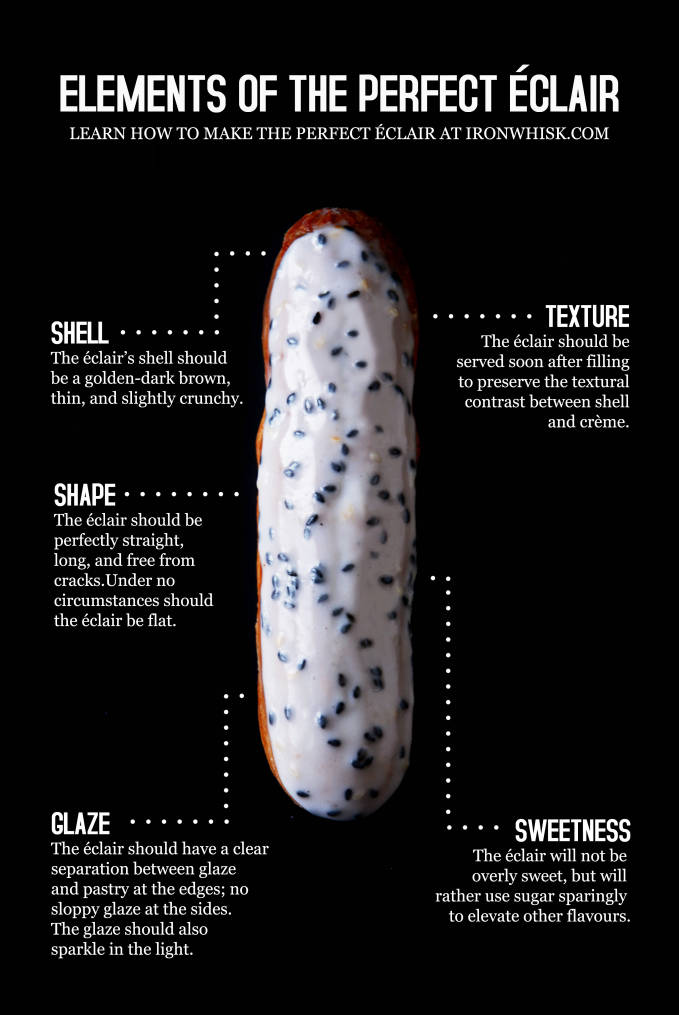
Food historians don’t quite agree as to why the pastry’s name means a flash of lightning in French—some believe the pastry’s moniker is a result of how quickly its eaten (“eaten in a flash”), while others claim its due to the fact that it sparkles when coated with glaze, like lightning. Regardless of its name, éclairs are undoubtedly delicious if made correctly. But they’re usually not.
The Five Deadly Sins of Éclair Baking
A quick Google search will reveal that most éclair recipes available online have severe flaws. I was able to identify five main problems when browsing recipes I had found online, which I’m going to call “The 5 Deadly Sins of Éclair Baking”. You’ve committed one of these deadly éclair sins if yours are
- Under-baked: Éclairs should have a rich, brown colour. They should not, by any means, be a pale, light brown. Under-baking results in a soft shell that fails to deliver the much needed textural contrast a good éclair provides. Under-baking éclairs can also cause them to collapse when removed from the oven.
- Flat: An improperly made éclair will be flat instead of puffy. Flat éclairs are a result of either the pastry not expanding enough in the oven or collapsing shortly after being removed from it. What’s so bad about flat éclairs? They can’t be filled and they don’t look nearly as impressive.
- Old: Éclairs should be served the same day they are filled. Delays in serving éclairs result in the moisture from the filling (usually pastry cream but sometimes ganache or whipped cream) seeping into the shell. When this happens, the éclair loses the textural contrast between its crispy shell and velvety filling. It just tastes soft.
- Cracked: This is probably the second most common sin, right after under-baked éclairs. A good éclair should not have large cracks running through it. Large cracks make glazing almost impossible and filling far trickier.
- Sloppy: A properly made éclair should not be dripping with glaze, but rather have a clear, straight division between the glaze and the rest of the pastry.
If your éclairs have any of the preceding problems, you shouldn’t be disheartened. Most people screw éclairs up. In fact, when I posted a recipe for raspberry éclairs two years ago, I committed all five of these deadly éclair baking sins. Oops.
But here’s a good question: why are we, collectively, okay with mediocre éclairs? Why was I okay with mediocre éclairs?
I think it’s because most of us don’t know any better. Online, you can find so many quests bakers have gone on for perfectly fluffy cakes, lightly crisped croissants, or hollow-free French macarons. But there’s almost nothing out there for éclairs. There’s just not enough good éclairs out there for us to even know what the perfect éclair is. How can we strive for perfection when we don’t even know what perfection is? Well, folks, that’s about to change. Today, we’re breaking down the perfect éclair.
In this lengthy post (about seven times longer than usual!), I’m going to share the findings from my éclair experiments over the past few weeks. I’m going to share my tips and tricks for avoiding all five of these deadly sins.
Sources and Inspiration
This tutorial is a combination of findings from my baking experiments (where I held everything constant except one factor to determine its effects), Eddy Van Damme’s recipe, Alton Brown’s Good Eats episode, and a video that I found online of the legendary Japanese pastry chef Sadaharu Aoki making éclairs.
This tutorial is primarily focused on Chef Aoki’s recipe, who is known for selling arguably the best éclair in Paris. While he normally doesn’t publish his recipes (you might remember me complaining about that in my last post where I recreated his famous salted caramel tart), I found a video online where he shared his éclair recipe. After finding someone to translate it from Japanese to English for me, I was all set to make the perfect éclair. I was ready to walk in his ‘choux’s.
What’s Choux Pastry?
Éclairs, profiteroles/cream puffs, croquembouches, churros, crullers, funnel cakes, some beignets (not these), St. Honoré cake, and gougères are all made from a type of paste called choux (pronounced SHOE). Since this tutorial covers how to make excellently-crafted choux pastry, a necessity for the perfect éclair, its helpful advice is not just limited to the oblong pastry. I highly suggest that you use the strategies discussed in this post in all of your choux endeavours to achieve the best possible results (that means that if you wish to make the choux recipes that I linked to in this tutorial, like the profiteroles or the funnel cake, use the new recipe at the bottom of this post for the paste instead).
Choux paste (or pastry) uses the power of steam to puff up, whether in the oven, hot oil, or boiling water. Choux has no special leavening agents—it’s just made from water, milk, butter, flour, salt, sugar, and eggs.
Achieving a Browned, Crispy Shell: Milk or Water for Choux?
My recipe for éclairs uses both milk and water in the choux paste, as many do. You may see some recipes that just use one or the other (like the old one I used for raspberry éclairs and profiteroles). Leaving out either milk or water, like I did before, is not a good idea. Both are very important and serve different purposes. The water in choux paste helps give the éclairs a crispy shell, while the sugars in the milk add colour and the proteins in it help support the éclair’s shape.
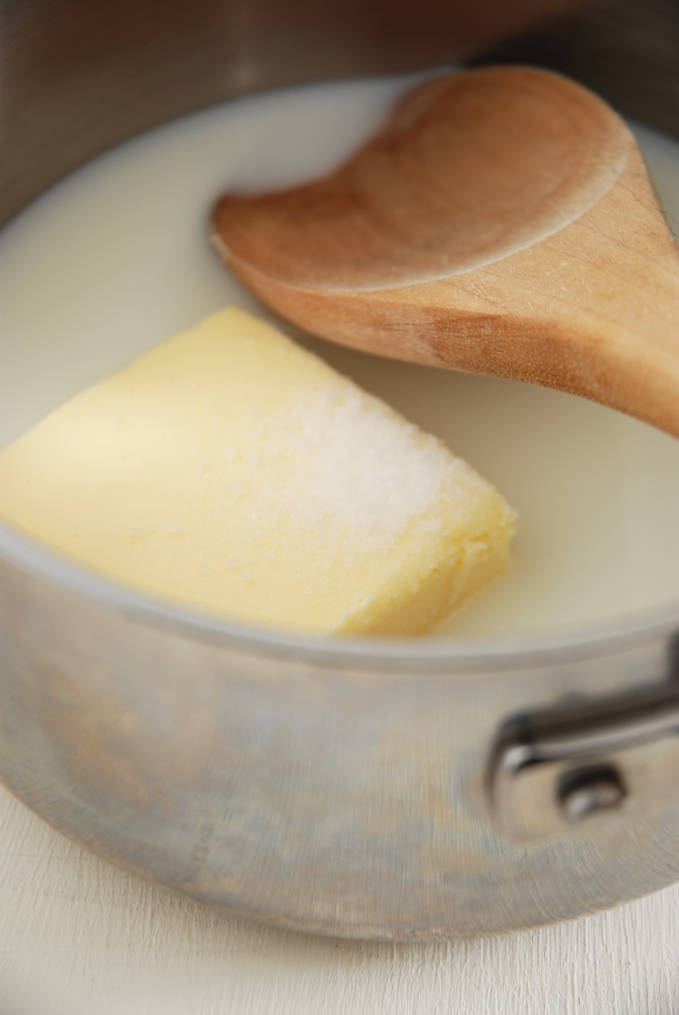
My new recipe starts off fairly simply: bringing milk, water, butter, salt, and sugar to a simmer. Bringing everything to a simmer ensures that the sugar and salt are properly dissolved. If they aren’t, the chunks of sugar and salt crystals will promote cracking when you bake the choux.
 Avoiding Cracks: Salt, a Key Ingredient
Salt has a very important function in choux paste recipes. Simply put, it helps avoid cracks. Generally, the more salt you add to the dough, the fewer cracks you will end up with in your éclairs. That being said, the more salt you add the saltier your final result will be (obviously).
Not using salt in the filling and glaze and increasing the salt content of the choux paste is the best way to address this problem. Of course, if you’re making savoury choux pastry like for gougères (cheesy profiteroles), salt isn’t an issue for choux. (That’s a pun.)
Flour Power: Which Flour Should I Use?
Using the proper type of flour in éclairs is a necessity if you wish to avoid sin #2, flat éclairs. Flat éclairs not only look ugly, but they’re also very difficult to fill properly. I’ve seen éclair recipes that use, in order from least to most protein content, cake flour, all-purpose (AP) flour, and bread flour. The higher the protein content of the flour (i.e. the closer it is to bread flour), the better the éclair will be able to support itself and stay puffy. The more protein in the flour, the crispier the shell will be too.
Don’t believe me? Check out the picture below. The éclair on the left was made using AP flour, while the éclair on the right was made using bread flour. All other variables were held constant. The éclair on the right is far better. Just try filling the one on the left!
You shouldn’t take this experiment, however, to mean that you can’t make éclairs using all-purpose flour. You can. It will work. However, recipe for recipe, I’ve found that my results are far superior when I used bread flour. I committed fewer of the deadly éclair sins.
Regarding cake flour, which has even less protein than all-purpose flour, I would suggest avoiding it for choux paste. For some strange reason, Sadaharu Aoki seemingly uses cake flour in his éclair video. I think he either misspoke or the video was incorrectly translated because the results you’ll get with cake flour are definitely no good.
Adding & Cooking the Flour: The Important Details
After the milk, water, butter, salt, and sugar are brought to a simmer, the next step is to take the pot off the heat and add the sifted flour all at once. Why all at once? Your goal is to shock the flour with heat so that, according to Alton Brown, the starch molecules in the flour gelatinize and are able to hold onto all the water in the batter. Well, at least, that’s his reason. I’m not so sure. I didn’t have a chance to test out the effects of adding the flour all at once vs. slowly.
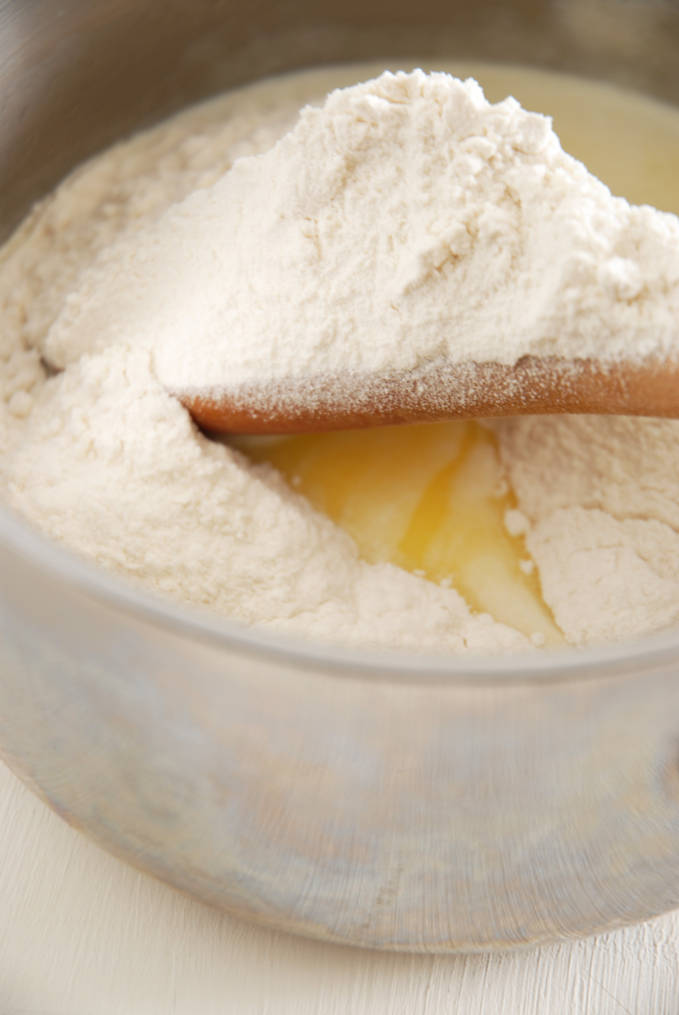
Regardless, once the flour is added, the mixture needs to be stirred, still off of the heat, until the flour is no longer visible.
Adding the flour when the mixture is not being heated is important to avoid chunks of flour in your choux paste (along, of course, with sifting the flour before adding it). When I made two batches of choux paste, one where the flour was added and combined off of the heat and one when it was not, the batch that was heated during flour addition had many more clumps of flour in it. These clumps formed cracks in the éclairs when they baked.
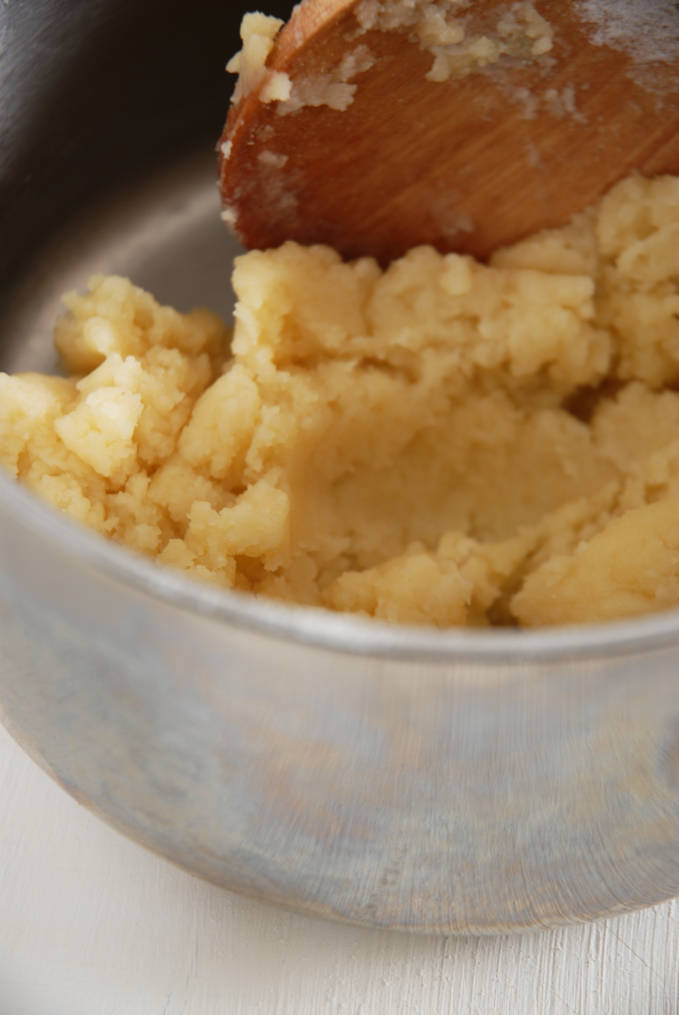
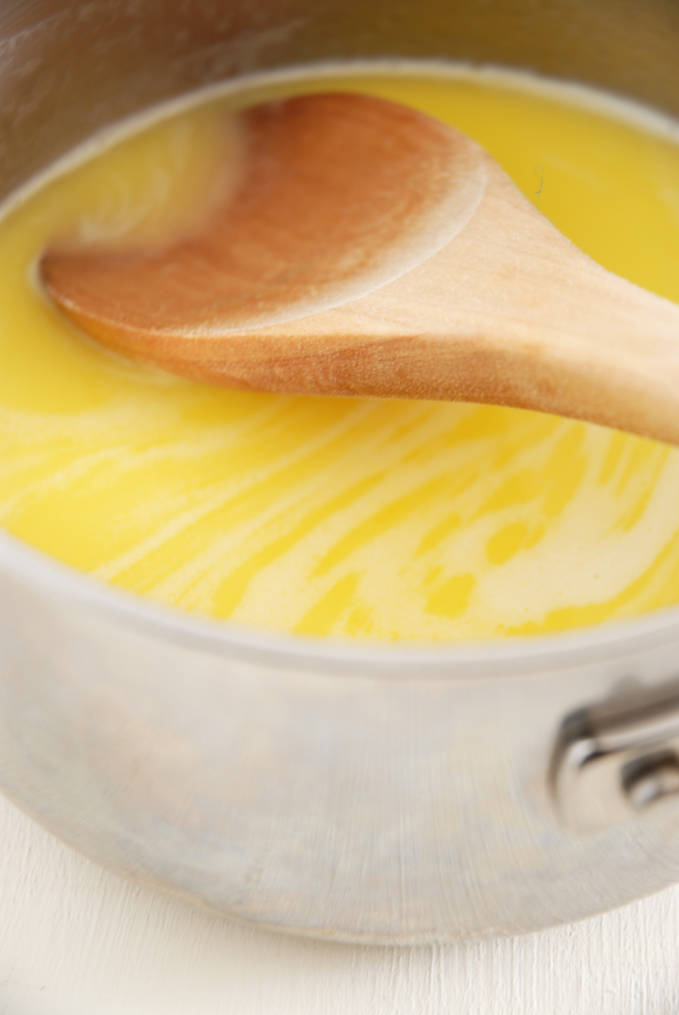
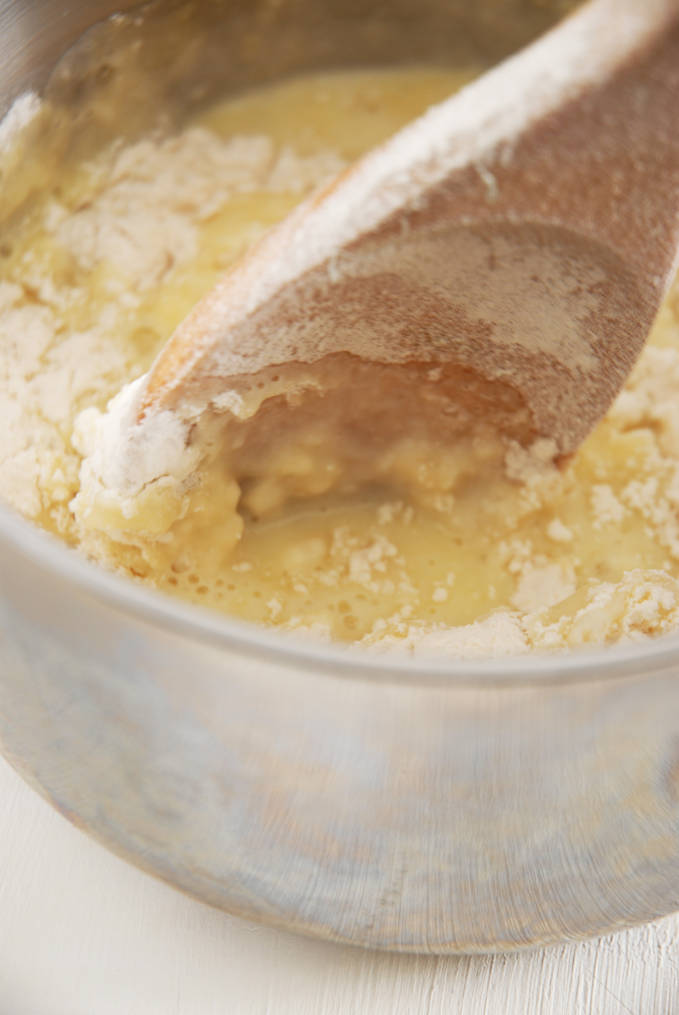
Once the flour is incorporated, the pot should be returned back to the stove for about two minutes. Heating the choux paste after mixing in the flour is essential. Doing so evaporates any water that isn’t trapped in the complex starch network of the dough. If you don’t do this, your éclairs will not rise properly because instead of the steam expanding the dough in a predictable fashion, it will be quite random and you’ll see lots of flat, cracked éclairs.
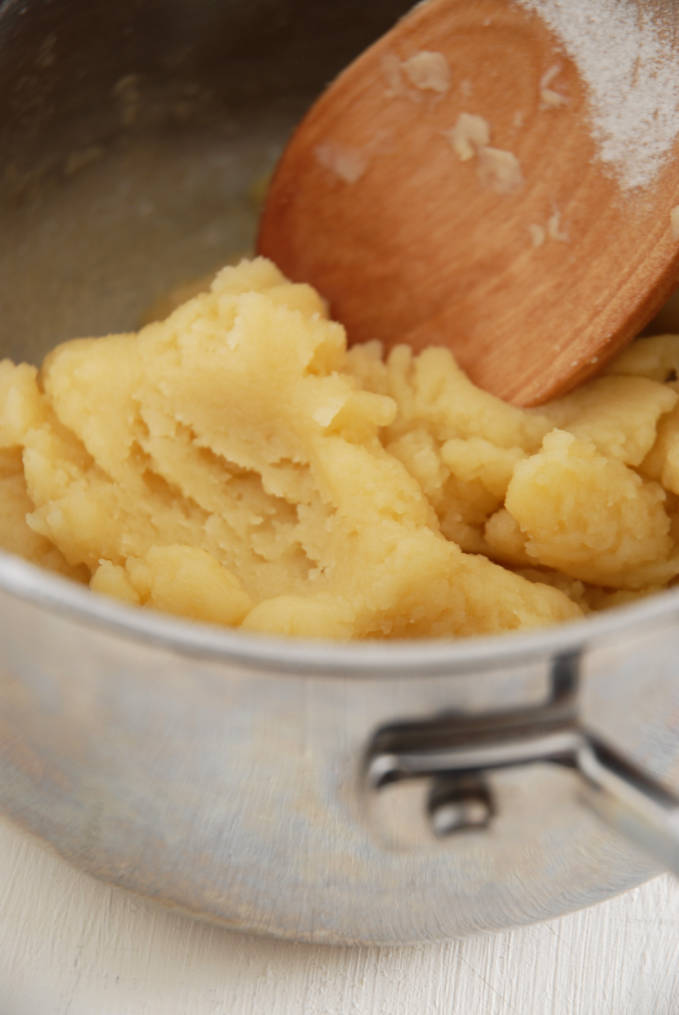
How do you know when you’re done? You should see a thin starch coating at the bottom of your pot. This is good. Sadaharu Aoki, however, warns that with some pots you’ll never get this coating. That’s why he recommends heating the dough until it reaches 75°C (170°F). That’s what I do too, just because I enjoy knowing exactly when it’s ready.
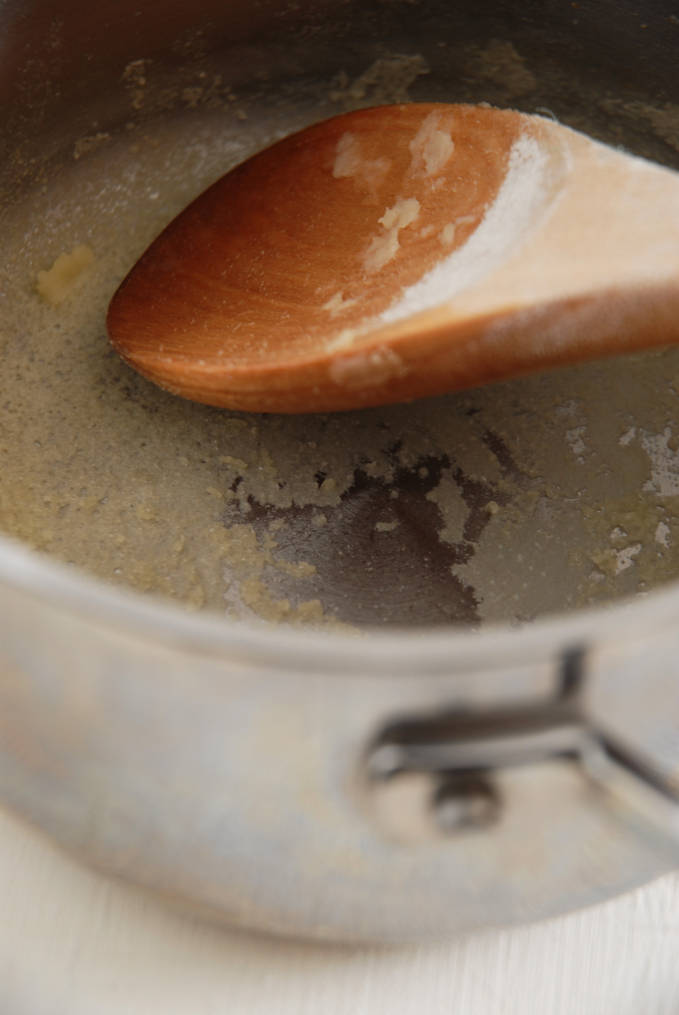
Since this coating forms while cooking the dough, you need to be careful not to mix it into your choux paste while cooking. If you do, you’ll end up with a non-smooth dough that promotes cracks. Therefore, when cooking the dough, do not mix as you would with most anything else. Mix with your spoon or spatula slightly above the surface of the pot so you do not scrape the coating into your paste.
Adding Eggs
Eggs are probably the most important ingredient in choux after water, which helps provide the steam necessary for the éclairs to rise. Egg yolks provide emulsifying power and flavour, while the proteins in the egg whites help support the éclair shell so that it doesn’t collapse. In fact, the proteins in the milk, flour, and egg whites work together to support the shell.
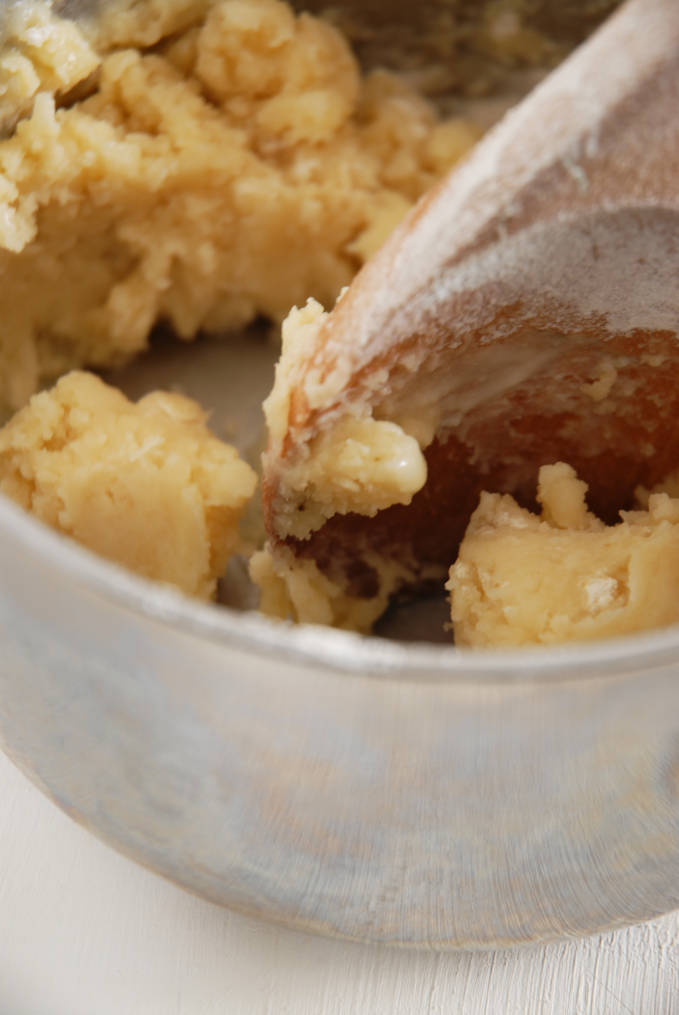
Adding the eggs is a simple process, but you need to be careful that the dough is not too hot before mixing them in or the eggs will curdle and promote cracking. Thus, before adding the eggs, it’s important to mix the dough for about a minute and thirty seconds to release the steam and let it cool down to about 60°C (140°F). At that point, you can add half of the room temperature, lightly-beaten eggs. Lightly beating the eggs before adding them helps ensure that the egg whites and yolks are properly distributed throughout the dough.

Once the first half of the eggs are incorporated, the rest should be added slowly, with the mixer still running, until combined. A bit more mixing after that is a good idea, too. You’ll end up with choux paste that is smooth, shiny, and hopefully lump free.
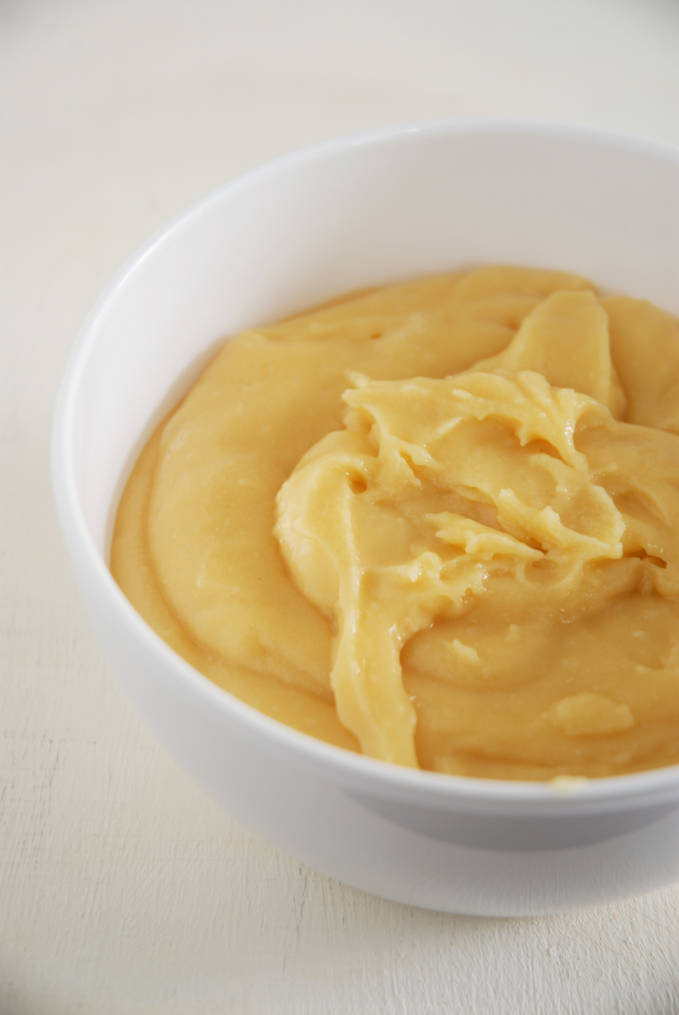
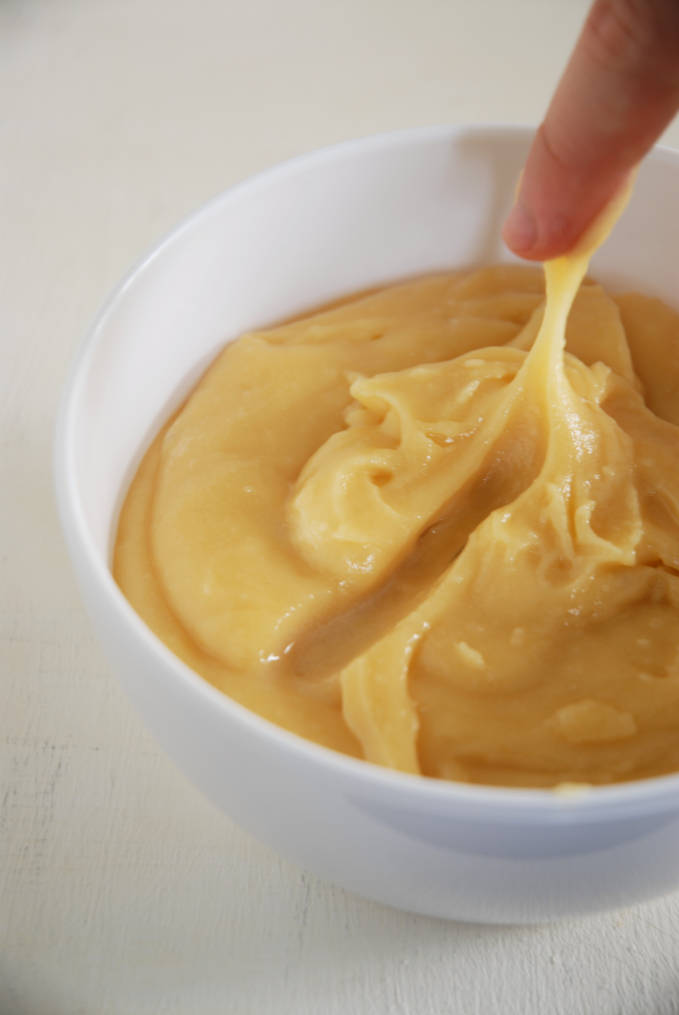
If you dip your finger in cold water and drag it through the choux paste, you should end up with (a) a trough that doesn’t collapse into itself and (b) a peak of dough where you lift your finger. This test helps ensure that you have the proper dough hydration (i.e. the right amount of liquid in it to help the choux puff up evenly in the oven). I got this idea from Sadaharu Aoki, and it’s lovely. When I was testing out different recipes with different hydrations, some would pass this test and others wouldn’t. The ones that passed the test produced the best éclairs.
 Piping Éclairs: Preparing the Pan
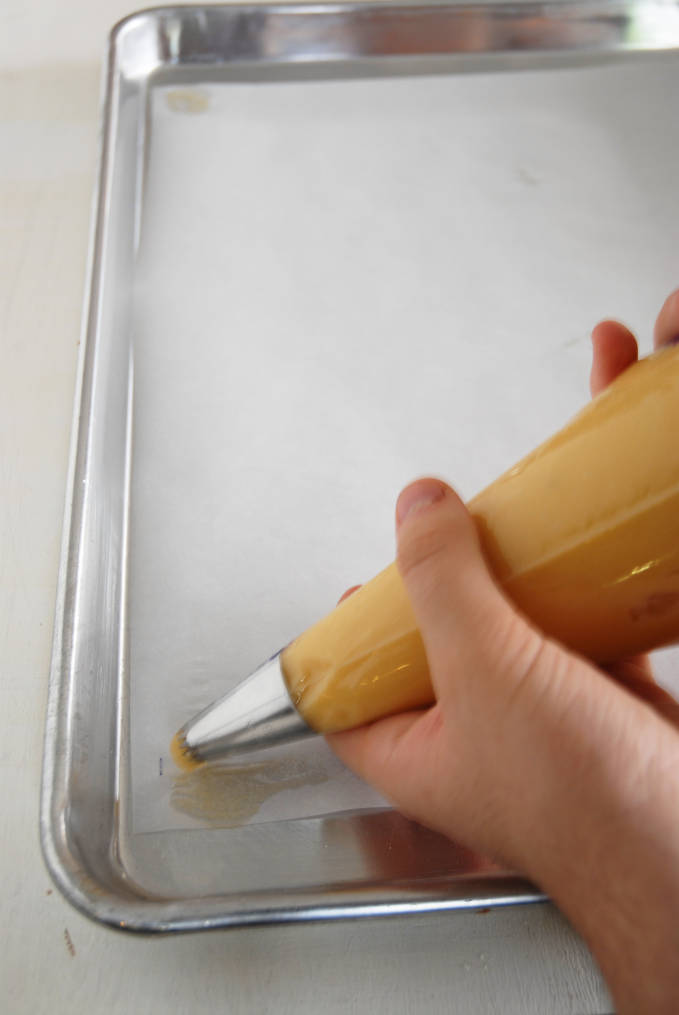
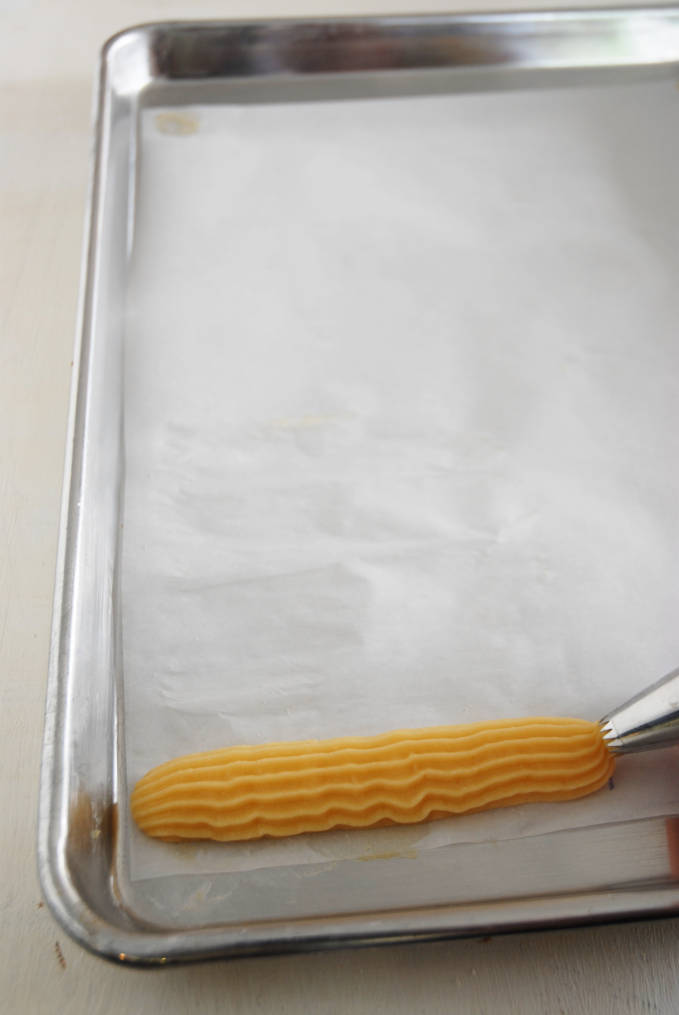
Éclairs should be piped onto a parchment paper-lined baking sheet as the proteins in the eggs would cause the éclairs to otherwise stick to the pan. However, if you line a baking sheet with parchment paper, it will likely slide around. That’s not very helpful when you’re trying to pipe a straight éclair. That’s why I secure the parchment paper to the sheet pan by dabbing on some choux paste between the parchment and the pan I’m placing it on. The choux acts like glue and prevents sliding paper while piping.
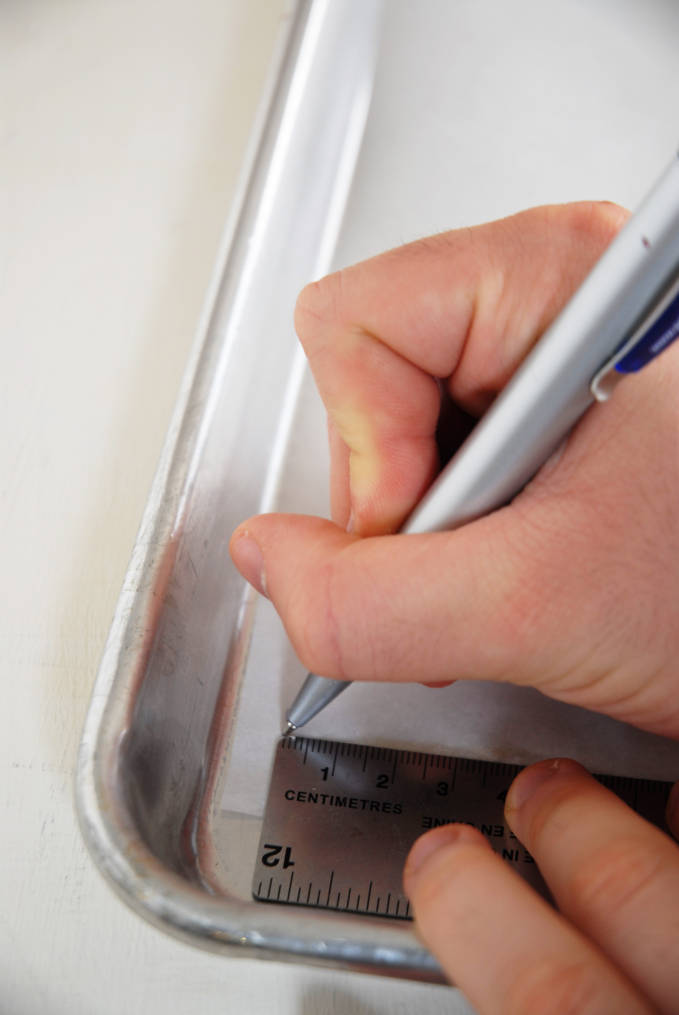
If you’re having issues with differently sized éclairs, consider marking down how long the éclairs should be on your parchment paper with a pen or a pencil before piping. Guide marks will help ensure each éclair is the proper length, around 13cm (5 inches).
 Piping Éclairs: The Piping Tip
The single most important way to reduce cracking in éclairs and ensure that they are puffy instead of flat is to use the proper piping tip: a star-shaped tip, about 1.5cm (1/2 inch) in diameter, with as many fine teeth as possible. The teeth create ridges in the dough that helps it expand without cracking. If you use a round piping tip, you will get cracks.
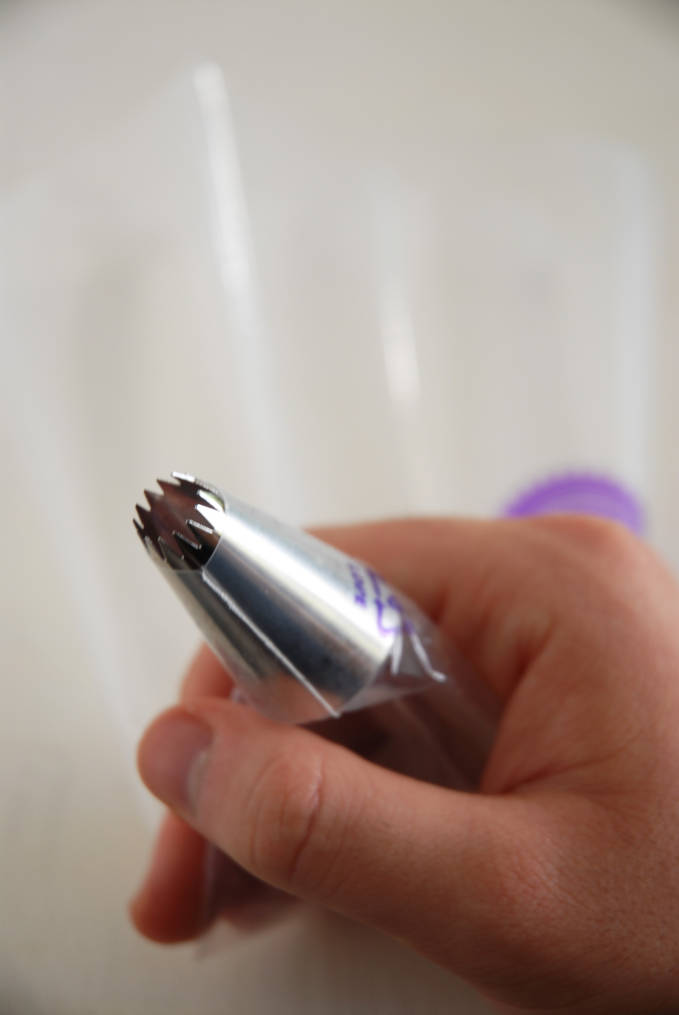
That being said, if you only have a round piping tip, you can minimize cracking by running the tines of a fork lightly through the piped dough to create ridges. However, you will still have some cracks with this method. It’s not perfect. I highly suggest investing about $1.50 and getting the right piping tip. This is probably the most important take-away from this tutorial: get the right piping tip for éclairs. I use a piping tip similar to this one.
Piping Éclairs: The Actual Piping
After filling up your pastry bag with choux paste, pipe the dough in straight lines at about a 45° angle to the pan. I’ve tried piping parallel to the pan and perpendicular to it, and I’ve found that 45° is the best way to get éclairs that are neither too thick nor too tall, but just right. (It’s the Goldilocks angle.)
Width and height are important here. Éclairs that are too thin and not tall enough will have minimal room for filling.
If you press lightly and move the bag quickly, your éclairs will be too thin. The trick is to press very strongly and move the bag at a medium speed. That way, you’ll end up with decently thick éclairs (about 2.5cm/1 inch) that are also quite straight.
When you get to the end of the éclair, there are two general ways that you can stop the stream of choux paste: shake the pastry bag to release the paste or drag it back over the already piped section.
I’ve had far better results with the former method. While most pastry chefs use the latter method, I’ve found that my control with the piping bag is not good enough for it. I tend to bring the bag too far back and destroy the ridges in about one-third of the éclair, which ends up cracking. On the other hand, most pastry chefs, who have far better pastry bag control than I do, are able to stop the flow in a much speedier “flick of the wrist” type motion and only destroy the ridges in a very small section of the éclair so they don’t get much cracking. Assuming your piping skills aren’t very good or you like to play it safe, I’d go with the shaking method. It’s only disadvantage is that it’s a little bit slower.
Piping éclairs takes practice, so just keep on going at it until you’re happy with how they turn out. You can always scrape the dough back into the pastry bag with an offset spatula and try again (psst… if you look carefully at the picture above you’ll see darker sections, which are the remains of scraped off éclairs).
Egg Wash: Weighing Browning Power vs. Cracking Power
With an egg wash, you’re facing a seemingly impossible situation: you can either brush the éclairs with an egg wash and end up with browned, cracked éclairs or not brush them and bake up pale, crack-free ones. So, which sin do you choose to commit? Sin one or sin four?
Don’t be silly. You don’t have to do either.
Here’s the deal: you can use an egg wash on your éclairs. But, and this is a big but, you need to be careful. If you apply too much egg wash, such that it spills over the sides of your éclair, the egg will trap the éclair to the pan and prevent it from puffing up. This will result in cracks as the éclair tries to break through the egg barrier. But, if you apply the egg wash gently, an egg wash is fine.
But who has time to be careful??
I use icing sugar instead of an egg wash on éclairs.
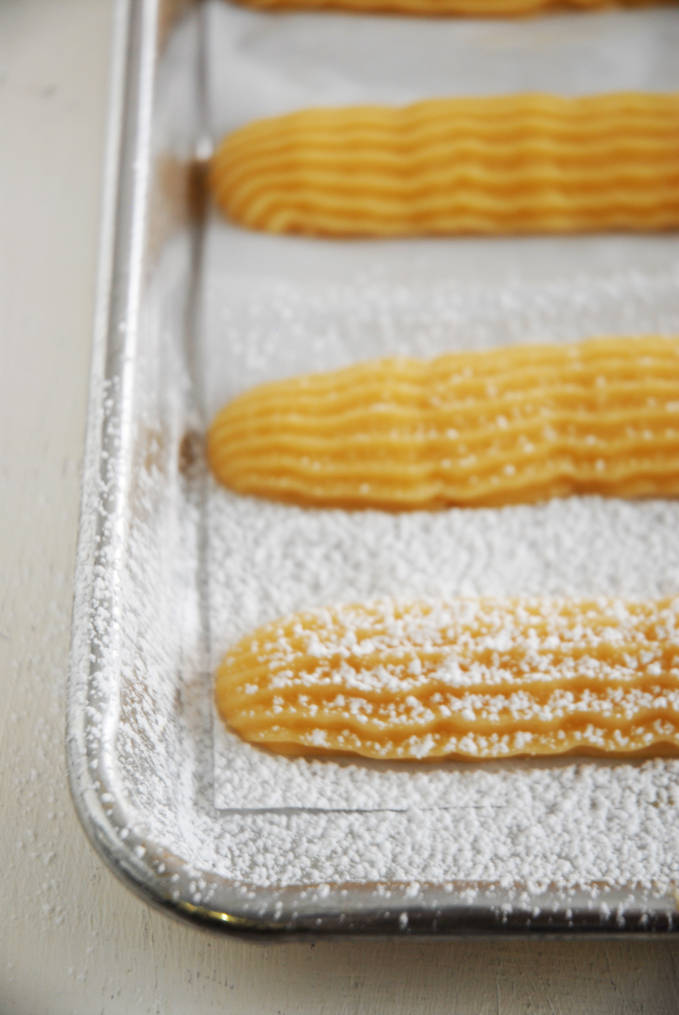
A quick dusting of icing sugar will help encourage browning (caramelizing the tops of the éclairs) and let the éclairs puff up properly. Plus, it’s much quicker than carefully applying an egg wash.
Thou shalt not sin with icing sugar!
Baking
Some recipes suggest starting at a high oven temperature and then lowering it when baking choux. The reasoning is that a high temperature will help the éclairs puff up, and then after that a low temperature is necessary to simply dry them out.
Frankly, I’ve played around with temperatures, and they haven’t made much of difference for me. I just start with one temperature, 180°C (350°F), and stick with it. It works fine.
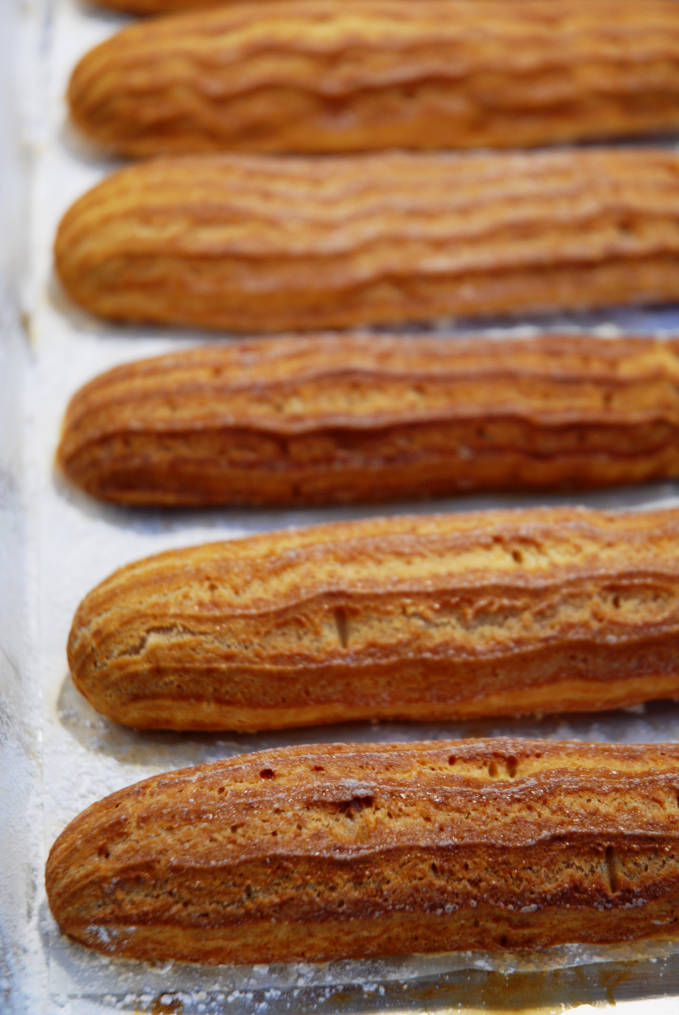
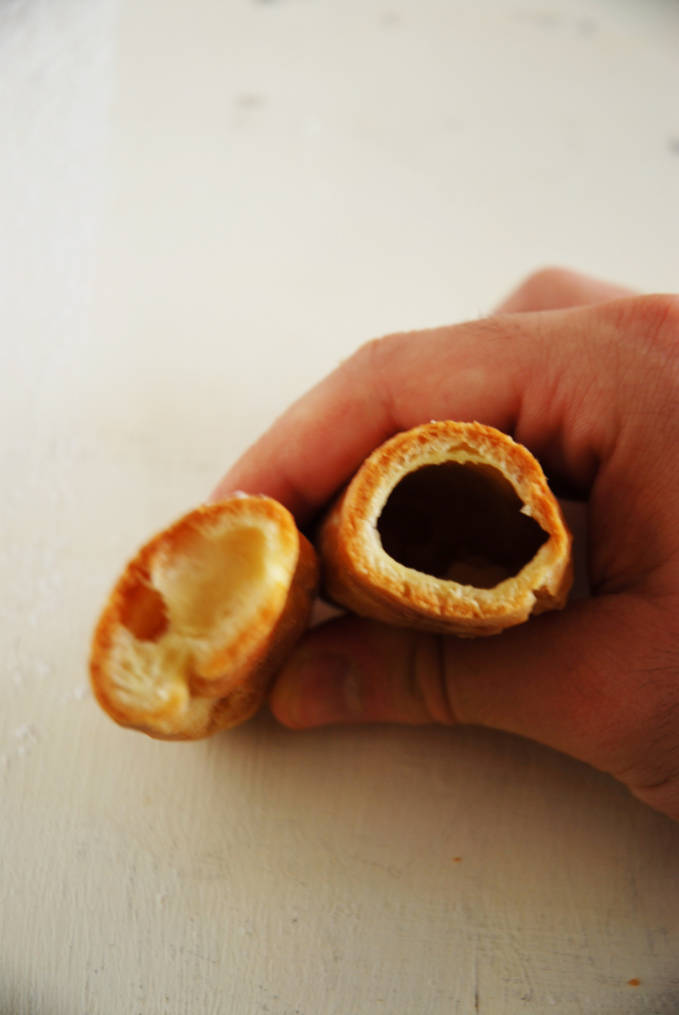
Once the éclairs are done baking, I like to cut a little slit at the bottom of each one with a paring knife to release steam. Otherwise, when they cool, the steam will condense into water and the inside of the éclair will end up soggy. They may also deflate.
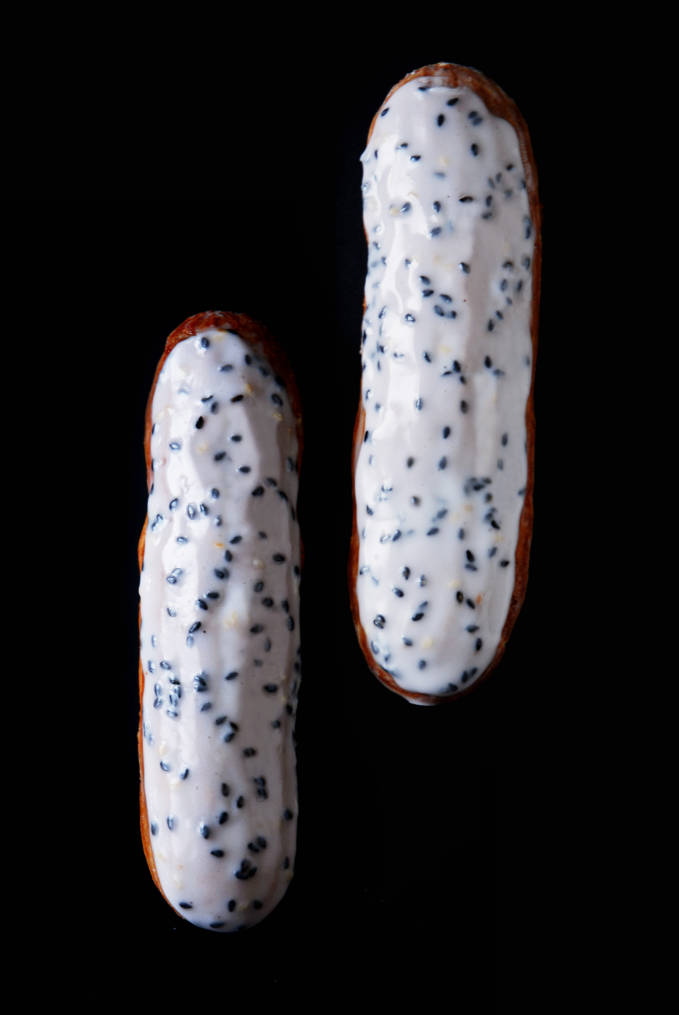
But, if you add the slit, you’ll end up with the perfect éclair shell: lightly crisped, a perfect shade of brown, and a large inner cavity ready to accept a creamy filling.
Filling
I don’t have any photographs for this step because it’s relatively simple. Whip up a batch of pastry cream, whipped ganache, or whipped cream and fill the éclairs. You can either cut them in half and pipe the filling in decoratively, or you can make three holes at the bottom of the éclair with a round piping tip or pen and then fill the éclair with a pastry bag. If you choose to go the latter route, make sure that you use enough filling. There’s nothing worse than an empty éclair. That should probably be sin number six.
While Bismarck pastry tips (with a long nose) are often suggested for filling éclairs, I don’t like them very much for this purpose. Their opening is too small to use for pastry cream, which is quite thick. They work much better for thin fillings, like mango curd for mango doughnuts. I just use a piping bag with a large, round tip for éclairs to fill them after I made the holes (I don’t make the holes with the tip in the bag since it’s messy). Works like a charm.
Glazing
I’ve seen four types of glazes for éclairs: chocolate ganache, melted chocolate, poured fondant, and a simple icing sugar glaze. All of these work great and can be modified to suit the flavours you’re working with (e.g. by adding colourings, flavourings, and decorations). A simple icing sugar glaze (made with icing sugar and a splash of milk or water) is the easiest option, but it may crack. Melted chocolate or a simple chocolate ganache is most common.
A key note for glazing: make sure that your glaze is thick enough! A translucent glaze will reveal the éclair shell under it and it will also drip, preventing you from achieving a neat, professional coating on your éclair.
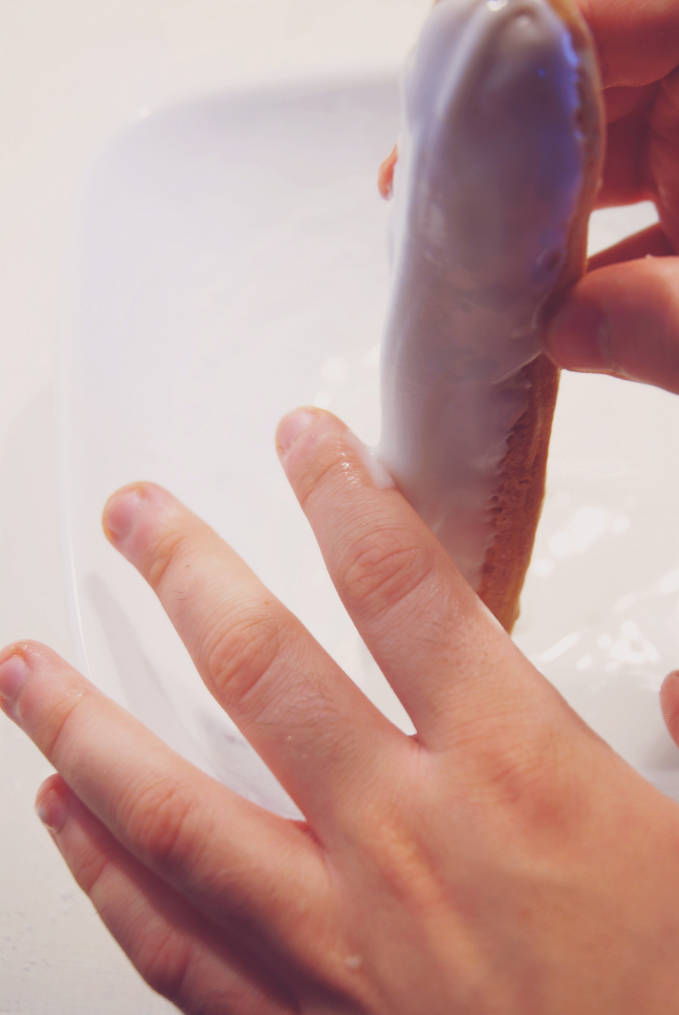
Unlike what some may suggest, glazing an éclair is a four step process.
First, dip the éclair into the glaze and move it side to side to ensure that its top is completely coated. Then, take it out of the glaze. This is usually where most people stop, and they end up with sloppy glazing work. You don’t want to be like most people though, right?
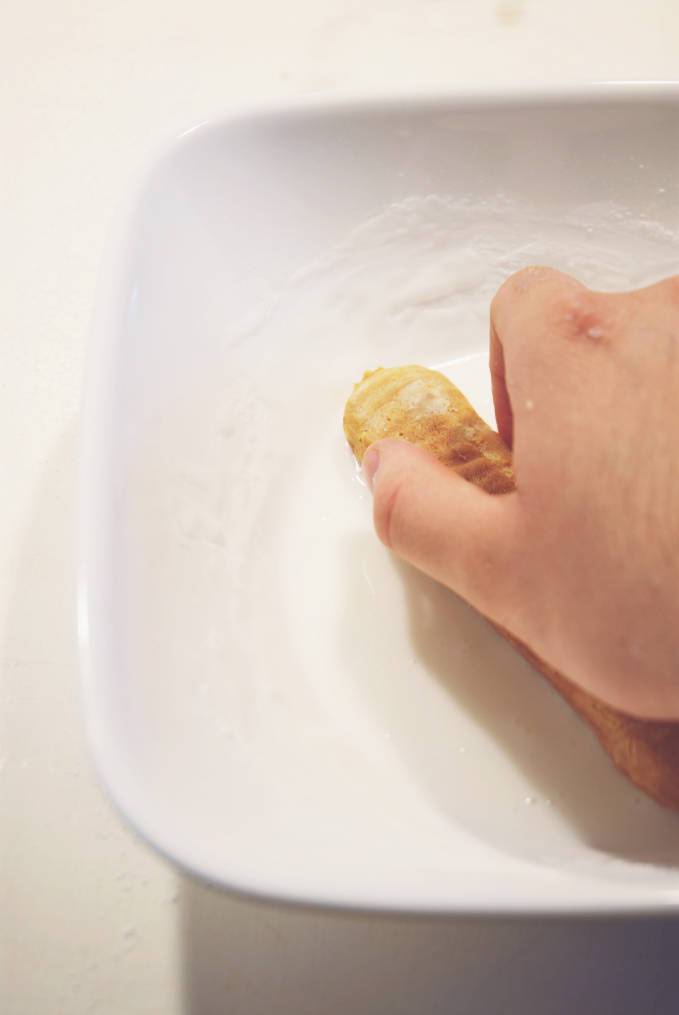
Second, use your finger to return the excess glaze on the top of the éclair back to the bowl by dragging your finger through the “stream” of excess glaze. (P.S. sorry for the blue hue in the next few photos; I had to switch lighting sources.)
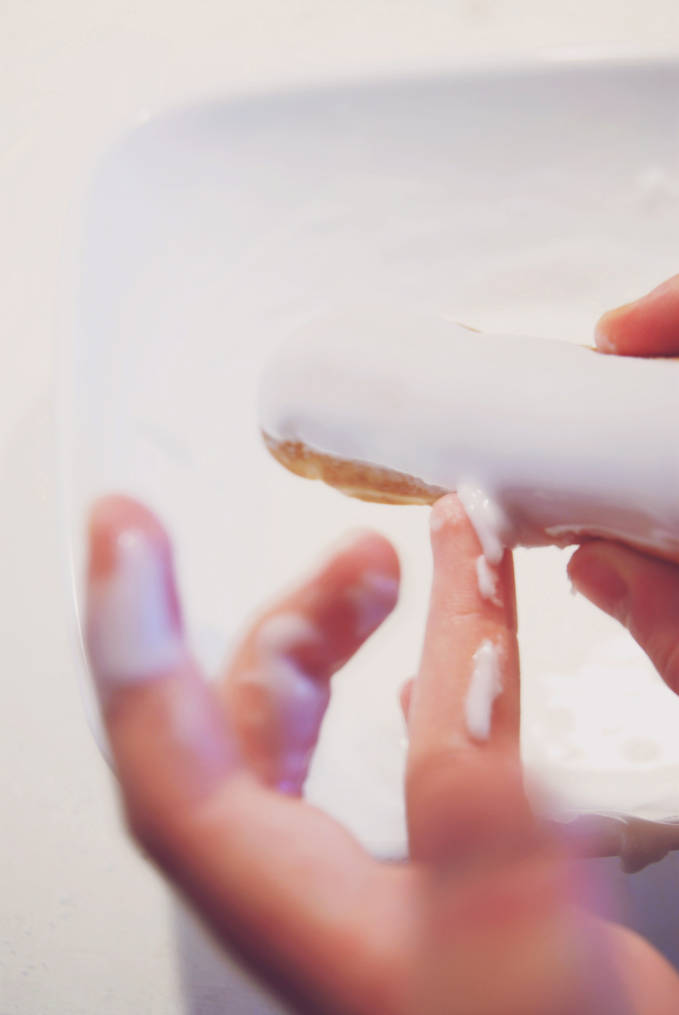
Third, use your fingers to wipe off excess glaze on the sides of the éclair and get a straight edge.
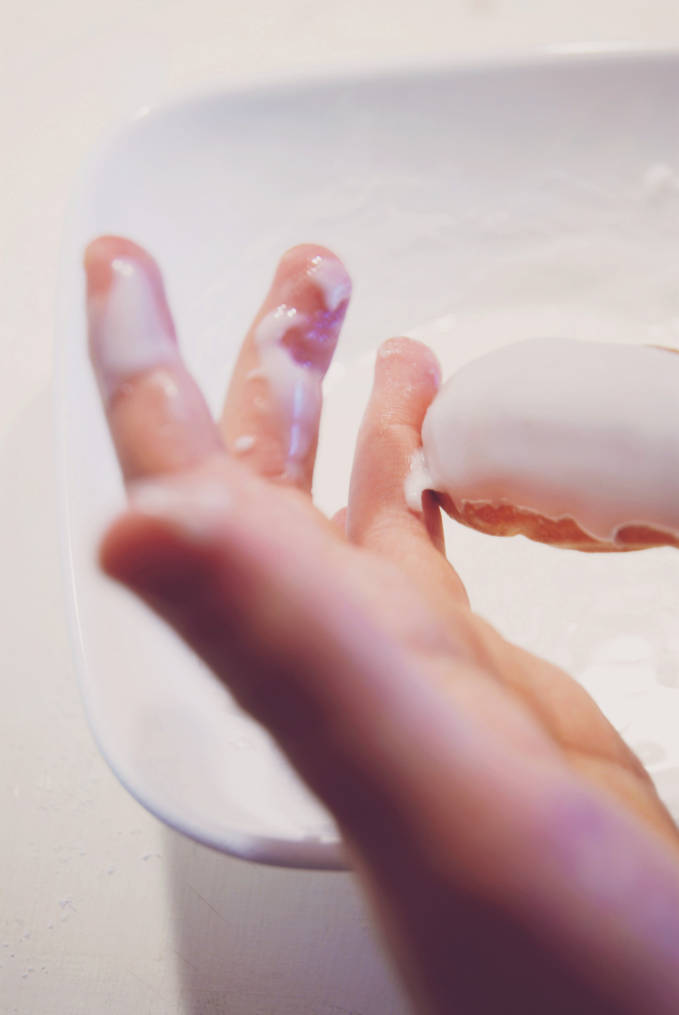
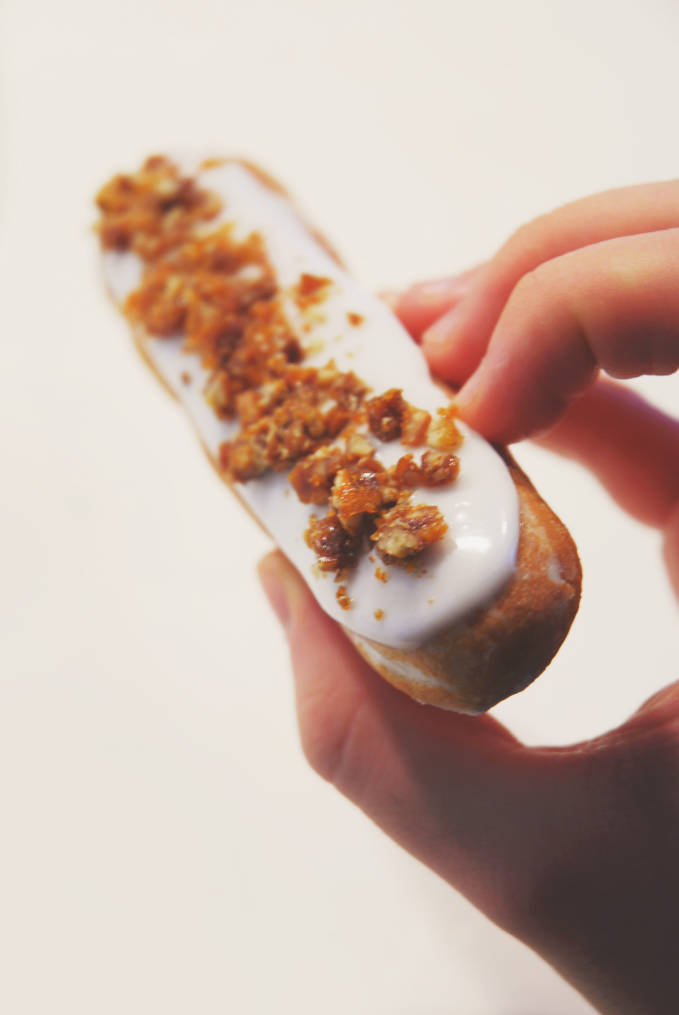
Fourth, use your fingers to wipe off excess glaze at the curved sections. At this point you can add any toppings you wish (like candied nuts, fruit, etc.)
Ta-da, the perfectly glazed éclair!
 Conclusion
Éclairs are special treats; they deserve more than haphazard technique. Focus. Refine. Practice. Eventually, you’ll get the perfect éclair.
Below, you’ll find my meticulously tested recipe for choux pastry. You can use this, as previously noted, for a variety of applications like éclairs, profiteroles/cream puffs, croquembouches, churros, crullers, funnel cakes, some beignets, St. Honoré cake, and gougères. To make the classic éclair (this recipe makes about eight 13cm/5 inch long ones), fill the baked dough with a vanilla pastry cream and dip in melted chocolate.
Liked this tutorial? Read another one!
- 75g water
- 75g milk
- 75g butter
- 5g sugar
- 3g salt [Update 04/05/2019: Changed from 5g to 3g]
- 100g bread flour, sifted (note: if frying or boiling the choux, you can replace with AP flour)
- 150g eggs (about 3), room temperature and lightly beaten
- Icing sugar, for dusting
- Bring the water, milk, butter, sugar, and salt to a strong simmer in a medium saucepan over medium heat.
- Remove the pot from the heat and add all the flour at once. Stir vigorously until the flour is completely incorporated.
- Return to heat and mix the dough, being careful not to scrape the bottom of the pan as a film may form there while cooking. Cook until the dough reaches 75°C (170°F), about two minutes. You may see a film form at the bottom of the pan.
- Transfer the dough to a bowl and, using a stand mixer fitted with the paddle attachment, mix on the lowest speed for about one minute and thirty seconds, such that the dough cools down to 60°C (140°F). You can also do this with a spoon or a hand mixer.
- Add half of the eggs and mix, still on the lowest speed if using a stand mixer, until combined.
- With the mixer still running, or your hand still stirring, add the rest of the beaten eggs slowly while you continue to mix. Once incorporated, mix for an additional minute until the dough is smooth.
- Use as directed in your recipe, or make éclairs, below…
- Prepare a parchment paper lined baking sheet by dabbing a bit of choux between the paper and the pan at each corner to secure the paper to the pan.
- Transfer the choux to a pastry bag fitted with a star tip, about 1.5cm (1/2 inch) in diameter with as many small teeth as possible (about 16 is good).
- Pipe the éclairs in 13cm (5 inch) lengths, and about 2.5cm (1 inch) wide, at about a 45° angle between the bag and the parchment paper-lined baking sheet. Space the éclairs about 5cm (2 inches) apart. If needed, mark lines with a pen or pencil on the parchment paper to ensure the éclairs are equal in length.
- Dust with icing sugar.
- Bake in a preheated oven at 180°C (350°F) for forty minutes, or until slightly darker than a golden brown.
- Remove from the oven and make a thin slit at the bottom of each éclair while still hot to let the steam escape. Let cool completely before filling and glazing.
I LOOOOVE how informative this post is! Pinning!
I love this. Thank you for posting. I just find your website and I can’t believe it took me this long. Thank you. The pictures look amazing and I will be trying with my daughter.
THANK YOU! I’ve been looking for so long for a great source to make a proper Eclairs. You just made my day!… Week! a Month!!
Video “玄米茶のエクレアの作り方” was very helpful as well!
My husband doesn’t eat sweets as a rule, except if there are eclairs or profiteroles then he’s belly up to the table. Thanks for a great tutorial!
I’ve never made eclairs before – therefore loved this post!
I really appreciate all the work you put into these gorgeous babies. The final product shows all the effort. Kudos!
wow this is a really informative and detailed post on choux making. thanks for all these tips! i cant wait to try them out the next time i make choux.
Oh wow, thanks for dropping by Michelle! I’m a big fan of your blog/the entremets you post :)
Haha I’ve not made an entremet for years. :P I made some some eclairs with your recipe! Looked and tasted good! :) Just wondering whether your white glaze above was icing sugar or white choco? I made some using icing sugar today and it was quite sweet. Thinking of making it white choco next time round…
Well, Google logs everything and I often Google entremets and end up on your site, haha!
I’m glad they looked nice! Regarding the sweet glaze, the best way to do it is to use a poured fondant coating. Here, I just did icing sugar because I was focusing on getting the shells right. Poured fondant is less sweet and easier to flavour–it is also what Aoki uses. But it broke my food processor, so…
Is the butter that you used for this recipe salted or unsalted? Thanks for your time
Always unsalted!
Your blog is a bible for sweets. I appreciate all your hardwork and study to create good recipes and this post is a great example of that! Very high quality post! I will think about this post every time I eat good eclair… and won’t complain how expensive each piece is. ;)
I love eclairs and profiteroles. Your eclairs look absolutely perfect!
Hi,
My wife fell in love with Aoki’s raspberry eclair on our last visit to Paris, it’s now a toss up between these and Patisserie Des Reve’s raspberry tart for best food group ever. Any possible chance you could get Aoki’s raspberry cream recipe as it’s the best part of the entire thing for mine?
Hey Mark, unfortunately I don’t have access to that. I got really lucky with this one because he posted a video, but generally he doesn’t post recipes. If you’d like a recipe for a raspberry pastry cream, check out my raspberry éclairs recipe. For the choux paste, use this recipe though. Sorry!
Thanks for the quick reply. I did see your raspberry recipe, but his was a dark red with the most amazing flavour. Trial and error it is apparently!
Thank you for this amazingly detailed post! I just went to Paris recently and snagged two copies of Adam Christophe’s books (because they were so beautiful and the flavor combinations were really intriguing), but as pastry chef books usually go, the basic choux recipe are the bare minimum steps. My eclair shells weren’t very successful based on those steps, and I’m sure I made a ton of mistakes. Thank you for linking to Sadaharu Aoki’s video as well :) I can’t wait to try your recipe!
Beautiful tutorial! Another thing that you can do to help that the eclairs bakes more evenly is making a ‘craquelin’ which is essentially a sort of crumble. Super easy to make, same amounts of sugar, butter and flour blended together and rolled out thinly, gives the choux a whole different dimension, sweet but not as horribly sweet as fondant.
Hi Ilan,
I have problem with glaze. I use christophe adam recipe for the glaze, i found the glaze is translucent and dripping on the side. How to get thick glaze ?
Try a pourable fondant if you don’t want to use too much icing sugar.
As a pastry chef myself, I have always prided myself in knowing that I make excellent eclairs. But, after reading your post, it got me thinking and revisiting my formula. Your obsession is so infectious! I got hooked on eclairs! I even went so far as reviewing recipes from the eclair king himself, Christophe Adam, and I even purchased his books just to try his Choux recipe. But I got to hand it to you…your formula trumps his!!! Congratulations for your success! You’re formulation is the best I have tried, and believe me, I’ve tried plenty, having judged professional competitions for years!
Hello! I am a pastry chef who owns a baking & pastry school in Manila. For years, most pastry chefs (including myself) have used the standard choux pastry formula (125 g milk, 125 g water, 150 g flour, 200 g eggs), and up until I read your research, I was quite happy with the recipe I was using.
Your research changed all that. Test after test, your formula came out superior than those created by other seasoned chefs including Pierre Herme, Johnny Iuzzini, and even Eclair master Christophe Adam! My background is Classical French pastry and food technology, so believe me when I tell you…YOU HAVE UNLOCKED THE GREAT MYSTERIES OF CHOUX!
My congratulations to you! The world now has a NEW STANDARD CHOUX PASTRY RECIPE!
Warmest regards,
Joey E. Prats
Joey Prats School of Baking & Pastry Arts, Manila
Great tutorial! I made my first successful choux today (my second attempt) using a different recipe, but found the whole process so much fun that I’m eager to try others. The one I used didn’t have milk, and it used AP flour, so I’m really looking forward to giving yours a go.
I usually smear my baking sheets with butter to anchor the parchment (tip: I’ve found that the wrapper from the butter usually has enough butter clinging to it to grease at least one, but usually two, baking sheets. I do a lot of baking, so go through a lot of butter, and I save the empty wrappers for this purpose). Using dabs of choux paste is a really clever idea! But does that pastry rise/puff, or perhaps slide or shift on the sheet itself?
Now I’m thinking about raspberry pastry cream. :-) Or cherry…
Hey Dorothy! No sliding or shifting :)
I LOVE THIS! I made eclairs last year and wish I had seen this post! Instead I had a crazy excel spreadsheet comparing ingredient ratios and techniques. Absolutely gorgeous eclairs!
Thank you very much…
i’ve been looking for how to make a perfect glaze eclairs…and i finally found your website… :D
Hallo,
I found your tutorial and your advices more than ever can expect. I think a thank you for all this is not enough. I would like to try your recipe , cause my wife dies for chocolate eclair, but I have a question about backing first. In which type of oven did you bake yours? A convectional or a double deck oven. Thank you very much for your time
This tutorial is more than can expect to read and find. I think you can find so many details that your eclair will be PERFECT. I would like to try your recipe and your advices but i have question befor, if you can help me. Which kind of oven did you use a convection or a double deck? Thank you for your time
Hi George, I used the convection setting.
Great recipe but the oven temperature is too low to get a good rise from the choux. 2nd sheet I bumped it up to 375 for the first 8 minutes then back to 350 for the rest of the bake and they turned out great!! Thanks for all the lovely research :)
This is awesome. I’ve just started playing with making eclairs and this post is so helpful. A quick question – I like the idea of the three holes to make sure it is filled with cream, but I was thinking of doing it on top so the holes are covered by the glaze. Do you think that would work?
Great idea
Good tips! I usually got good texture when they first come out of the oven but later soften when they cool down. Do you know how we can make the shell before hand and still retain their crispness?
Hi there
Which tip should I use to pipe Choux buns? When I’ve made them before, they look great when they are piped, but then lose their round shape when baked.
Thanks
I too have been doing what you did in this post–I had previously been using chef eddy’s recipe, but I started searching for what could have been a better one and came across the Aoki video where I basically observed it for different techniques and then I came across your blog where you broke it all down from your translation. My shells baked beautifully, got them to a great shape and size, but they’re not hollowing out at all. I cut a slit in the bottom for when they cool, but when I crack them open, they’ve still got what looks like doughy spider webs inside. Do you have any tips to get them completely hollow while baking? Some people say 15m at a higher temperature and then lower it, but then others say that too high a temperature will promote cracking. If you shoot me an email, I can send you the photos (I just made the eclairs right now (5/22/15 @ 2pm eastern)
Hello my friend…
Another great recipe of you,thank you so much….
I need your help please.
Can you give some info (components or percentages of protein, carbohydrates, etc. etc.) or a link about “Bread flour” please to search something related here in country….???
Thank you so much for your time….!!! :) :)
Thanks for the tutorial! I’ve been looking for recipes to get crisp eclairs as mine always go soft very quickly. Can’t wait to try this!
One question, can the baked eclairs be made beforehand and stored (frozen? room temperature?) and would I need to put them in the oven again to crisp them up before filling?
Thank you! :)
Hi, I made this recipe but my eclairs turned out to be not hollow. I followed the recipe exactly but i wonder why it’s not hollow. Can you help me?
Will you please comment with what tip number that is exactly? Thanks!
Hi Ilan! I’m wondering why does salt play an imporant role to prevent cracking? Any explanation for this? And what kind of salt do you use? Table/ kosher? Thanks so much for this post
I use Kosher salt, but it shouldn’t matter too much if you weigh it out. And to be honest, I’m not sure about the science behind it.
I found the tips in this article to be much better than the actual recipe. Thanks to the tips, I was able to make beautiful eclairs that had a crisp exterior and didn’t collapse when cooling. However, the actual taste of the choux is very salty. I compared it to a recipe I used previously and this recipe has almost four times the amount of salt! If I was blindfolded I probably would have thought I was eating a saltine cracker, so my advice: follow the suggestions and instructions, but find another recipe.
Wow, this is so incredibly informative. I might have to try this out soon, as eclairs are my favorite pastry ever. (Living in France will turn you into a pastry addict, and quick!) Thanks for sharing!
I found this post very helpful , I have been trying to find an informative one and yours happens to be just right. Thank you so much!. It’s really amazing that you are 19 years old and have such knowledge and talent .Since I’m 19 too ,I find it inspiring and encouraging to be my best at whatever recipes I try. Thank you again.
Well, this is just an amazing post! Very informative. And exactly what the world needs for eclairs, I agree.
I was wondering, and this might be a dumb question but I just want to be sure… You say to make a slit at the bottom. But what exactly do you mean by the bottom? As in, the side that sits on the parchment paper? Or one of the outer ends? I’m not sure where I would make that slit lol
Yes, the one that touches the parchment paper!
OK great, thank you! So once you’ve cut into them, you turn them upside down for the steam to release? Or just put them back on the parchment like before?
Either should work fine!
I’m looking to make a lighter and crispier choux. I was wondering if you think that just using 1 egg yolk and add more egg whites to reach the proper 150g of eggs will work. I use the traditional pate a choux recipe and it takes about an hour to dry them up, and some still have a rather damp center. I want a nice puff, hollow interior and crispy shells. Almost like croissant type of crispy, ya know, if that’s even possible. I know the easiest answer is to try it myself, but I just thought perhaps you have some input.
This recipe should work well for your purposes!
hi !
I’ve tried your recipe! unfortunately I wasn’t able to achieve that peak that you would get when you dip your finger into cold water ! Instead my mixture turned out quite watery ! Any solutions to that ?
Regards,
Charlotte
Sounds like you need to cook the mixture a bit more.
I’m so thrilled I stumbled upon this tutorial! It’s so thorough, but everything is presented so simply that it doesn’t feel overwhelming at all despite the length. It’s truly wonderful. I can’t wait to bring these bad boys to my boyfriend’s hockey game tomorrow.
I have a few questions, but I don’t think you’ll see this before I actually make them, so I’ll have to keep it in mind for next time.
1. I saw in the comments that you use a convection setting. Do you have any recommended changes in oven temperature for those without a convection setting on their oven?
2. I checked out your profiteroles post, where the baking temperature is initially 400 and then lower it to 350 for the remaining time. The post is from 2012 and you state here to use this formula, but I am wondering where you stand on the time and temperature for baking them.
I’m going to play around with this tonight. It’s a good thing the guys aren’t picky.
Thanks again for the wonderful post!
:) Beth
Use the time and temperature listed here, not in the old post. Also, I don’t think you need any temperature changes if you don’t have convection. Should be okay.
That’s what I ended up doing. The only issue I had was that I piped them on the small side, but that’s on me. They turned out wonderfully, though.
what if the oven has a fan in it….fan based oven would that effect the baking.
thank you so much for this recipe! My first attempt was reasonably successful :)
I have a question about piping – I can’t seem to find a 1.5cm nozzle easily. I used a smaller nozzle 0.6cm for my first batch and obviously the eclair didn’t have enough height. Any advice?
Umm.. try finding one is the best I can offer! Check out Amazon, perhaps?
I found your post while trying to find a solution to cracking eclairs. I don’t know how to thank you. Just did a batch using many of your tips. The last 4 that I piped were perfect. A steady hand seems to make a big difference :) The star tip, bread flour, powdered sugar were all fabulous suggestions. One thing I found that was completely counter intuitive was that putting 2 sheets in the oven (on 2 racks) at the same time helps rather than hurts. I wasn’t even using convection. Usually, overloading the oven makes things bake unevenly, but in case of pate a choux, it creates more steam, which is a good thing.
Again, I don’t know how to thank you for doing all this testing.
Here in Canada we are not yet comfortable at weighing in ingredients …so I had to get my scale out …and except for the salt I got pretty much everything done as your recommendations… I was ready to give up on my 3rd attempt at making these delicious gems until I came across your tutorial and absolutely loved it… Visual aid, step by steps instructions… I feel confidant that I will be nailing the perfect eclair in just a few more trials … Thank you and I will watching your other tutorials ….
HI Ilan,
got a question here…..is it the only reason that the eclairs stay flat is that I use all purpose flour? I notice some raise and some stay flat. I actually made some yesterday. Secondly when I add the eggs in all of it, the dough is not shiny like your photo is the hydration off…..although it does create a trough like the one in the photo. Please advise.
How come you should not pipe the eclairs perpendicular to the sheet pan. and use a 45 degree angle……is it get the same amount of dough along the éclair? or even amount.
Thanks for all those tips and suggestions.
I’ve been having trouble getting the eclairs to hollow at an altitude. Any thoughts on how this might be fixed?
Hi, if my oven cannot bake multiple trays at one go. Should I leave the other trays at room temperature or in the fridge? I’m living in a country with around 35 degrees celcius. Thanks.
any tips for these eclairs not coming out hollow like in your photo?
they bake perfectly, no cracks and an awesome shape + texture. my only issue is that i can’t get them to be hollow….ever =/
Can u give recipe in cups instead of gs ty
Can you at least google???
I’m wondering this too! At least for the water and milk. All the conversion charts only give ml to cups, they don’t show conversion from grams to cups for liquid. Also every conversion chart I find is different. One told me that 225g of flour equals one cup and another one said 110g of flour equals one cup. So I don’t trust any of them. But I’m more confident about finding cups of flour from grams than I am liquid.
I just used this tutorial today and my coffee-caramel eclairs came out splendidly. Thanks so much!!
Fantastic recipe!!! Made for my work colleagues as part of a “friendly” competition, they went down fantastically. I filled them with chocolate cream and topped with Carmel frosting! Best eclair recipe I’ve find by miles!! Thank you
Thanks for the recipe. I tried it today and got a much better result than before. I still need to work on the shape and proper custard injection though. For some reason my eclair crack when I try to put the custard inside :(
Hello, i totally followed the recipe. But there is a thing not going on well. I guess is the flour . The problem is that eclair are perfectly baked, no cracks and smooth texture/shell but they are not empty inside :/ may i ask you the W of your flour? I used a mix 50% w460 and 50% all purpose flour. Maybe its too strong mixture? I’ve got another flour with 11 g protein /100g should i use it? Thank you in advance.
omg you are amazing I LOOOOOVE how deep it is… I actually have a big exam tomorrow on éclairs, you are my savior :D. I will enjoy to get more of those kind of articles.
LOVE this post. Thank you for your generosity of sharing all your research and knowledge! How many eclairs (approx) will this make at about 5″?
Thanks!
thank u for such a great recipe . I have made 200 Eclairs using the same recipe, (though some of them did collapse but overall a big help )and i am gonna pipe them with different flavours. I just have one query once i store hem in air tight containers them are soft not crisp do i need to crisp them up ? n at what temp n how long ? thanks again
Hi Ilan,
Thank you sooooo much for this incredible post. I made this for a croque-en-bouche a few weeks ago and they were delicious. So good in fact i’ve been asked to make them again.
My first attempt was a huge challenge in terms of time management…I had to bake, fill and assemble all the profiteroles in 1 day…Exhausting!
This time I need to bake them in advance as it’s for a large lunch event and I won’t have time to do everything in the morning. My question is can these be frozen after they’ve been baked and cooled, then taken out and recrisped in the oven (as I’ve read on other sites)? If yes, I’m assuming they’d have to be baked frozen rather than thawed first, right?
Finally as this is a big batch and my oven can only take 2 trays at a time, can the left over piped profiteroles sit on the counter at room temp while waiting their turn?
Thanks.
How many eclairs does this recipe make?
This tutorial is absolutely wonderful. I’m about to start making this recipe, but I need your help. I don’t have a scale, and I really need to know the exact measurements and amounts of all the ingredients, the same way you posted for the raspberry eclairs. Thank you very much Ilan. Amazing blog!!!!
I’m really sorry for the late response! You should be able to find mass to volume converters online, but baking by mass is usually best!
Thank you this was perfect! You saved me for a dinner party request!!!
This tutorial is great! Easy to follow, even for a novice baker like me. Unfortunately, I only have evaporated milk (the canned stuff) where I live. Is that an acceptable substitute for normal milk?
Hi, love your tutorial. Do you have on your ownpastry cream recipe to share?
Hi, yes, sorry for the late response! There’s a few recipes on the blog as sub-recipes. Check out this one for example.
Thank you for your recipe and great tutoral.
I’ve tried this recipe. Wow…I can do it!!!!
Thanks for sharing.
I was just wondering what type of thermometer you use to measure the temperature of the dough? Thanks so much.
A meat probe thermometer can work!
Thank you for your tutorial. In your tutorial you specify to use bread flour. I was reading that the Canadian all-purpose flour is equivalent to the American bread flour. In your tutorial, what brand of bread flour did you use since I am having a hard time finding bread flour in Toronto?
Hi, I live in Toronto. You should be able to find bread flour in most any large grocery store–I know Robin Hood makes some.
Hi, Im from Ensenada Mexico and I tried to make your Eclair recipe but ( note: this was my first time making Eclairs and Im not a cook or bakery), the Eclairs didn’t raise and they were too salty for my taste :/ I might try this recipe because I might put the egg mix too fast or the flour mix wasn’t at the right temperature when I added the eggs. Can I put less salt on the recipe?. I also forgot to spread the white sugar on top before putting them in the oven.
Could you share me a recipe for the filling? And also could you tell me if I’m wrong with what I did? I have a small coffee shop called Champs- Élysées in my town and I would like to make some Eclairs for my customers. So I will be trying this recipe once again until the come out perfect for selling :).
Thanks for sharing this Eclair information, it was helpful!
If you’re looking for a pastry cream filling you can modify the recipe I have here. As for the recipe, I suggest just trying it again. From looking over the comments it appears that it generally works well, so maybe your case might have been a fluke. Best of luck!
Hi Ilan:
Can I cut down on the amount of salt, I find that 5 grams of salt was quite salty?
Hi there! Thank you for the very informative post! I’ve tried numerous recipes but I always seem to have the same problem and I was hoping you could shed some light! I used your recipe to the T and baked my eclairs at 180 degrees for 40 minutes. But i always seem to find that the bottom side of the eclair has a huge crack/tear. The eclairs also don’t seem to rise evenly, some rise well but others don’t?! I’ve been battling with this issue for a while now. But there is always that large crack/tear to the bottom side of the eclair. Your feedback would be most appreciated!
Make sure you’re using the right pastry tip. That could help!
Right first time! Excellent recipe and tutorial. We had perfect ( though I say so myself) mini chocolate eclairs for father’s day. Next stop, your croissant recipe.
Hi! I found your website while searching for a completely different recipe. However I’m hooked to your site. I’ve already tried this recipe of yours. Texture was great but it was really salty. Can i reduce the salt? Also I used sea salt and not kosher salt. Does that make a difference? Thank you so much!
Kosher salt crystals are bigger than sea salt crystals, so less salt fits in a measure of volume. You might want to reduce salt if you’re measuring by volume and using sea salt, yes.
Hey how many éclairs would you get out of this recipe?
About ten!
After my first attempt at baking Choux Pastry I was not 100% happy with the outcome however, they still got good feedback. In my pursuit to nail this recipe and plenty of researching, I came across this one. My second attempt turned out amazing and now this is my go to recipe as once you perfect something there is no need to alter it! Great insight and enjoyable read. Thank you.
Wished I had found this post before my 1st eclair attempt a few weeks ago. 2 days ago I attempted a 2nd time using your recipe & it was the best choux pastry I’ve ever tasted. Bread flour is the way to go!
Hey. after trying to make choux a la creme for about 5 times now (still think my first attempt was my best:)) ), I found your receipe for choux paste and I just wanted to ask, I assume it’s ok to use for choux a la creme as well, right? not just eclairs I mean…
I’ve heard that breifly opening the oven door a bit 2/3 of the way through the cooking time to vent a little steam improves the crispness. Have you ever tried this?
Ilan, what size piping bag do you use for piping out the eclairs? When I pipe the dough leaks out the back.
I made this recipe today (after failing twice) and they were perfect!!! The time, technique, ingredients, everything was perfect. I am so happy I came across your post. All your research really pays off. Thank you :)
Hi , great recipe however mine turn out flat. I suspect my dough was too runny?
Can that be because I multiplied the recipe by three to make more?
Great Tutorial !
I’ve started adding more salt to my paté a choux and you’re right, it seems to help with cracking! Also at your suggestion I tried using just a little milk, about 25% of the total liquid, but I can’t see much difference? Anyway, keep up the good work!
Okay. I have made many eclairs in my time and was very impressed with the effort and details put into this post. However I tried this recipe and the batter is extremely, extremely salty. I initially thought that I made a mistake and went through the trouble of making another batch. Still super salty. I’m pretty upset that I didn’t go through the comments beforehand as this seems to be a common issue. I should have followed my gut instinct that 5 grams of salt is WAY too much for the quantity. What a waste of ingredients. Very disappointing. Why would you do this?