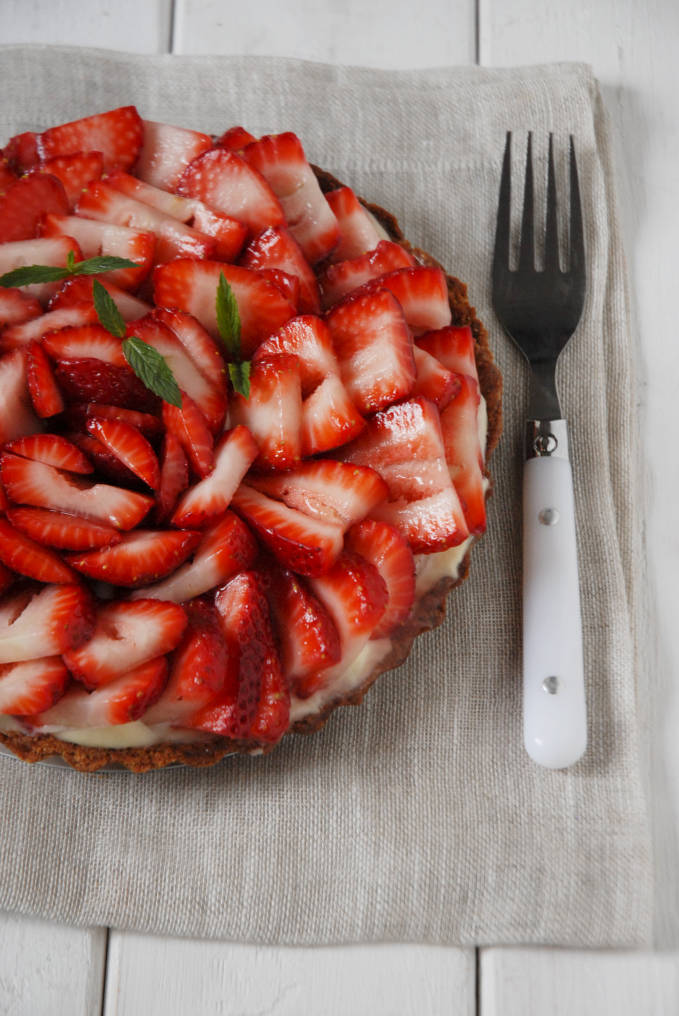
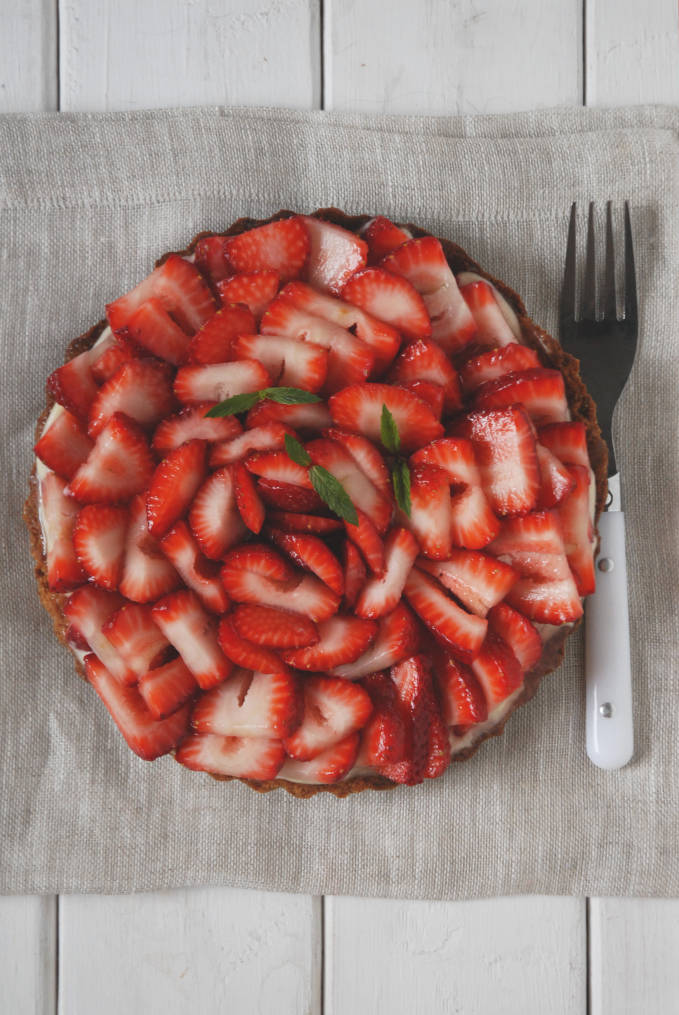
Fruit tarts and pies make for great desserts. They can be stunning and elegant, yet simple and relatively quick to prepare. You can use your favourite fruits, playing with multiple complementary colours and flavours. Alternatively, you could choose one fruit and let it shine, like I did here with this strawberry-white chocolate tart.
The key to elevating your tart or pie from okay to delectable is a perfect crust. A shortcrust pastry that is lightly sweetened and falls apart in your mouth. Choosing a great recipe is easier said than done, however, since they all seem to be so different. Why are there so many variations for pie and tart dough?
To answer that question we need to know what shortcrust pastry is.
What is Shortcrust Pastry?
Shortcrust pastry (called pâte brisée in French) does not puff up in the oven because it does not have any leavening agents. Shortcrust pastry falls apart easily when eaten. Shortcrust pastry is made with half the amount of fat as flour (mass wise). Shortcrust pastry is the same thing as pie dough. Shortcrust pastry is the same thing as tart dough. If you can make a great shortcrust pastry, you can make incredible pies (like this one – but use this crust recipe instead) and tarts. In this extremely long in depth tutorial, I hope to teach you how to make an amazing shortcrust pastry.
All pie dough or tart pastry recipes that you will find online are either the basic type of shortcrust pastry (made with flour, water, some type of fat, salt, and sometimes sugar) or one of two common variations of shortcrust pastry, listed below (note: there are other variations, but these two are the most common).
Pâte Sucrée (sweetcrust pastry)
Pâte sucrée contains an egg and has more sugar than the standard shortcrust pastry (there can be as much sugar as fat in this type of shortcrust pastry). The added sugar impedes the formation of gluten strands so the pastry breaks up easier. Working with pâte sucrée is much like working with cookie dough. I made a French pear tart with juicy Bosc pears and almond frangipane, spiked with some amaretto, using pâte sucrée. You can find the recipe here.
Pâte Sablée (sandy pastry)
Pâte sablée is a shortcrust pastry made with an egg, more butter that typical shortcrust pastry, and more sugar than in pâte sucrée. It is very delicate and crumbles easily. Pastry that contains more butter, like this pastry, is generally harder to work with because it is softer and stickier. Use this type of pastry if you would like a drier, crumblier dough.
Shortcrust pastry/pie dough/pâte brisée is the standard dough used for tarts and pies, while the other types of pastry are variations that are slightly less commonly used. In this tutorial, I will be focusing on shortcrust pastry proper because if you know how to make the most common type then you are all set for baking up delicious sweet or savoury pies, tarts, and quiches.
Choosing a Type of Flour
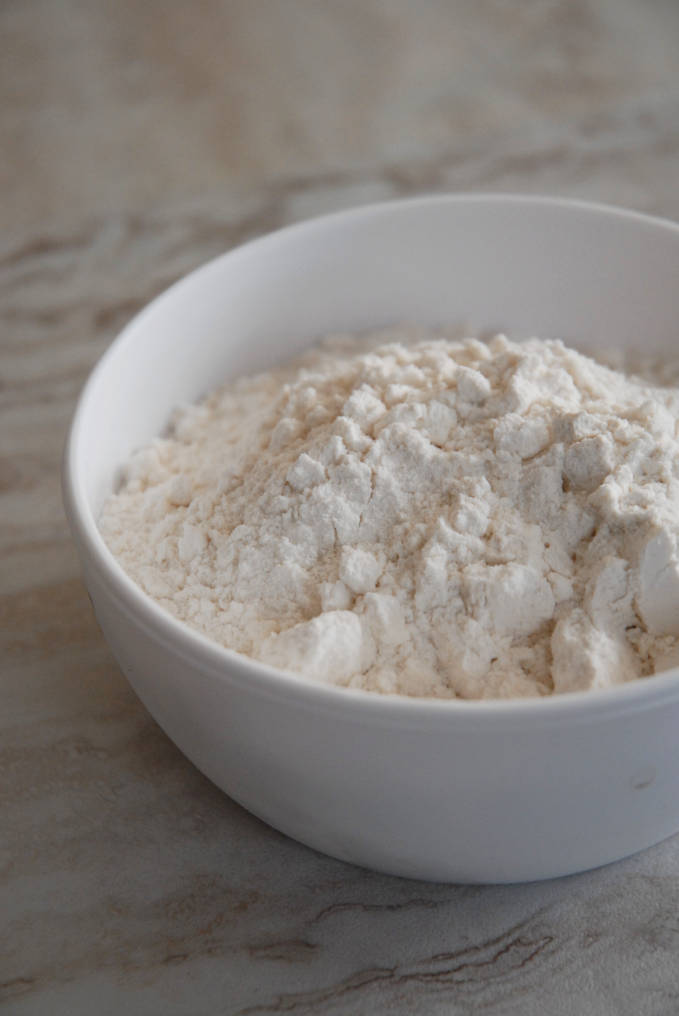
The first step of making shortcrust pastry is obtaining flour, either from your cabinet or your nearest wheat farm (unless you are one of those fancy bakers with a flour mill at home). I use 1 3/5 cups (200g) of cold all-purpose flour. Using the correct type of flour is a very important step in making any pastry. Your goal with shortcrust pastry is for it to crumble apart easily. Very little gluten development is necessary for this to occur.
Gluten is simply chains of two cross linked proteins called gliadins and glutenins, both originating in wheat flour. When these two proteins attach to each other they form an elastic, extensible “sheet” that holds dough together to give it shape. When making shortcrust pastry, you do not want the dough to be strongly held together. Instead, you want the dough to fall apart. How do you impede gluten development for this to happen? The first step is using a low-protein flour.
If you choose a flour that is low in protein (and therefore low in gliadins and glutenins) you will make a final product with fewer strands of gluten. Cake and pastry flours have very low amounts of these proteins, all-purpose flours have more, and bread flours have the most. Breads are chewy while shortcrust pastry is (hopefully) not because breads contain more strands of elastic gluten. While using cake and pastry flours is an option, I have found that they produce a pastry that is too dry and crumbly, which makes sense since there is very little gluten development. All-purpose flour not only solves this problem, but is also much more convenient to use. That is why I choose to use unbleached all-purpose flour.
Choosing a Type of Fat
The fat that you use to make your dough will greatly affect both the final flavour and texture of the pastry. You have a lot of phat options (that was supposed to be a pun) to choose from when making shortcrust pastry, with the popular picks being butter, shortening, and lard. I used to split the fat in my shortcrust pastry between butter and shortening (half of each) for my pie crusts, but now I prefer to use pure butter.
The main benefit of using shortening is that it is an excellent tenderizer that impedes gluten development by making protein cross linking more difficult. Fats, in general, stop gluten from forming by attaching to the aforementioned proteins and preventing water, which is necessary for gluten development, to bind to these proteins. The less gluten you have the flakier your crust. Shortening seems like an okay choice, right?
Sadly, shortening tastes bad. Butter tastes way better. So much better that I think the slight compromise in texture (since shortening is a better tenderizer) is worth the major advantage in flavour you obtain from using butter. In my shortcrust recipe, I use slightly less than half a cup (100g) of cold butter.
Should I Add Sugar?
Depends.
Do you want a sweet shortcrust pastry? If no, then do not.
If yes, it still depends. Sugar, just like fat, is a tenderizer. Sugars bind to the proteins and prevent them from forming strands of gluten.The more sugar you add the tenderer your pastry will be and the easier it will fall apart. Note, however, that it would also be more difficult to roll out a dough with less gluten because it would be very crumbly.
I use a quarter of a cup (50g) of cold sugar. This sugar helps both tenderize the dough as well as encourage the crust to brown while baking so it takes on a gorgeous shade of brown.
Should I Add Salt?
Yes. Salt helps elevate the other flavours in the pastry, especially the butter. Add just a pinch of salt.
Why Do You Recommend Using Cold Ingredients for Pie Dough/Shortcrust Pastry/Pâte Brisée?
A flaky pastry is the result of pieces of butter melting in the oven and leaving pockets of air in the crust. If your butter was not cold when you combined it with the flour then it would partially melt and large chunks of butter would not make it into the oven. Without these chunks of butter you would not get a flaky crust. Period.
To ensure that you do get chunks of butter, I encourage you to keep all your ingredients cold (especially your butter and water) so that the butter does not melt.
Keeping your water really cold is also important because warm water can deter the binding of the butter to the proteins, which is necessary to impede gluten development. I use about 4 tablespoons (60mL) of ice-cold water.
Should I add some type of acid like vinegar or lemon juice, or perhaps vodka instead because it does not leave an aftertaste, for a tenderer pastry?
Adding an acid or vodka to your shortcrust pastry (by replacing an equal amount of water with your liquid of choice) will make the dough stickier and harder to roll out. The slight advantage, however, is that doing so can help reduce shrinking and result in a very slightly flakier pastry. I do not think it is worth the trouble.
The Method
Now that you understand some of the science behind making pâte brisée, I would like to take you through the process of making this wonderful pastry.
I like to use my mini food processor to make pâte brisée because it really saves me time. Some chefs do not recommend using a food processor, however, because of the way that the butter is combined with the flour. This is because when making a pie crust you want there to be chunks of butter of two different sizes: small and even smaller.
Hmm.. perhaps that was not extremely clear. Some of your pieces of butter should be around the size of peas, while others should be much smaller after they are coated in flour. The larger pieces help with making a flaky crust and the smaller pieces help keep your crust tender by coating the proteins with fat and preventing the formation of gluten. The seeming problem with a food processor is that using it results in chunks of butter of uniform size, which is not what you want.
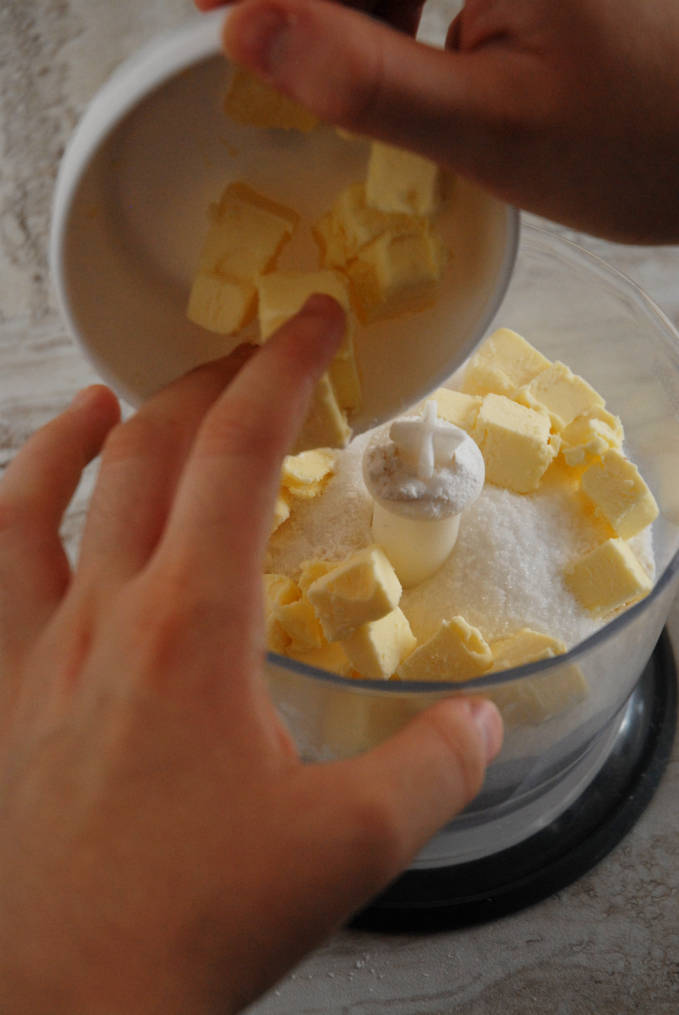
What I like to do is process half the flour, butter, sugar, and salt until large pieces of butter are present, and the other half of the flour, butter, sugar, and salt until tiny flecks of butter are left.
Pictured below is how the really tiny flakes of butter should look like – so tiny that you cannot make out individual pieces of butter. The pea-sized chunks of butter, on the other hand, are much larger.
Of course, if you do not have a food processor, you can use two knives or a pastry cutter.
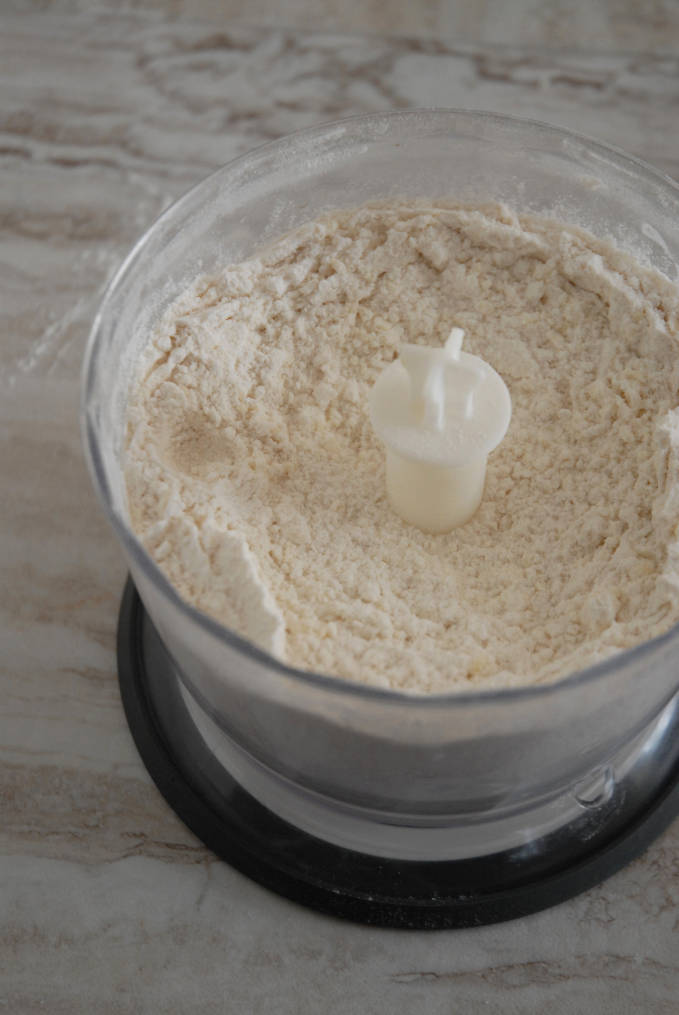
I then add both the flour-butter mixtures to a large bowl and drizzle in some cold water. To get a tender pastry, add as little water as possible. The more water you add, the more gluten will form, and the tougher and harder your pastry will be. Pour in just a little bit of water at a time.
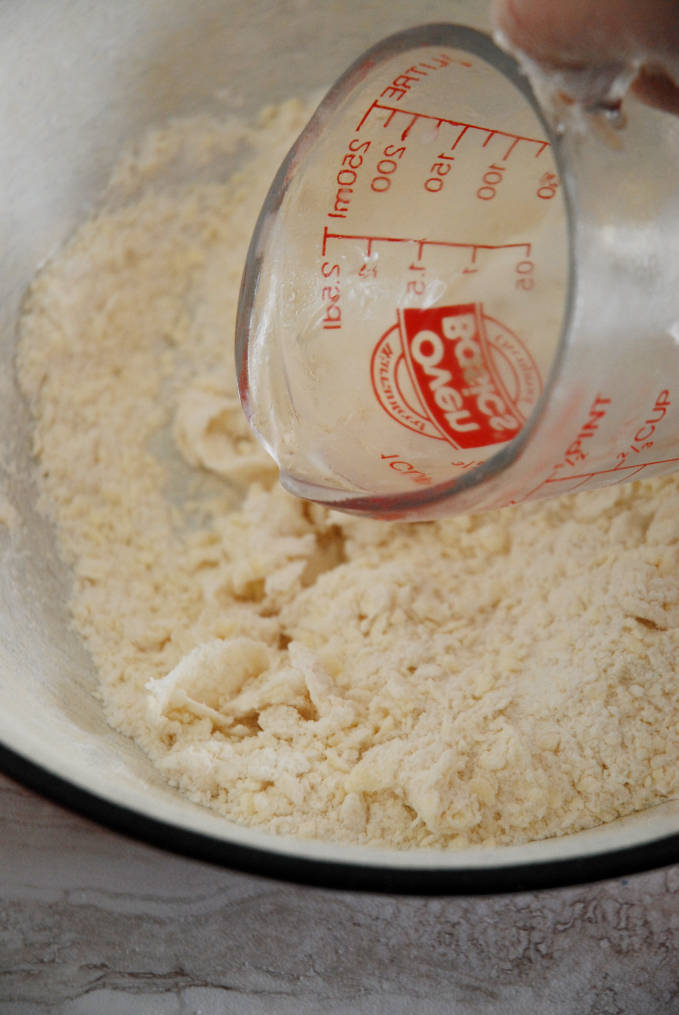
To combine the water with the other ingredients, I use my hands. I do not recommend using a food processor because it is difficult to see and feel the texture of your dough while the food processor, well, processes.
Some recipes discourage using your hands for this step because (a) doing so warms up the butter and (b) the hand movements form more gluten strands than simply using a pastry cutter. Those are valid concerns, but I do not like cleaning my pastry cutter.
The trick to using your hands instead of a pastry cutter is not to mix or knead the dough at all. Gluten chains form from mixing and kneading dough. The less you mix the dough, the less gluten will be formed and the flakier the shortcrust pastry will be. Rather than mixing the dough, use your hand like a whisk (pretend you are holding a tennis ball) and toss the dough together. Since the whisk shape limits surface contact with the dough, there is no significant heat transfer and the butter will not melt. Also, since you are not kneading, a negligible amount more gluten is formed than if you were using a pastry cutter or fork. I really like this method, but it does take some practice to do well.
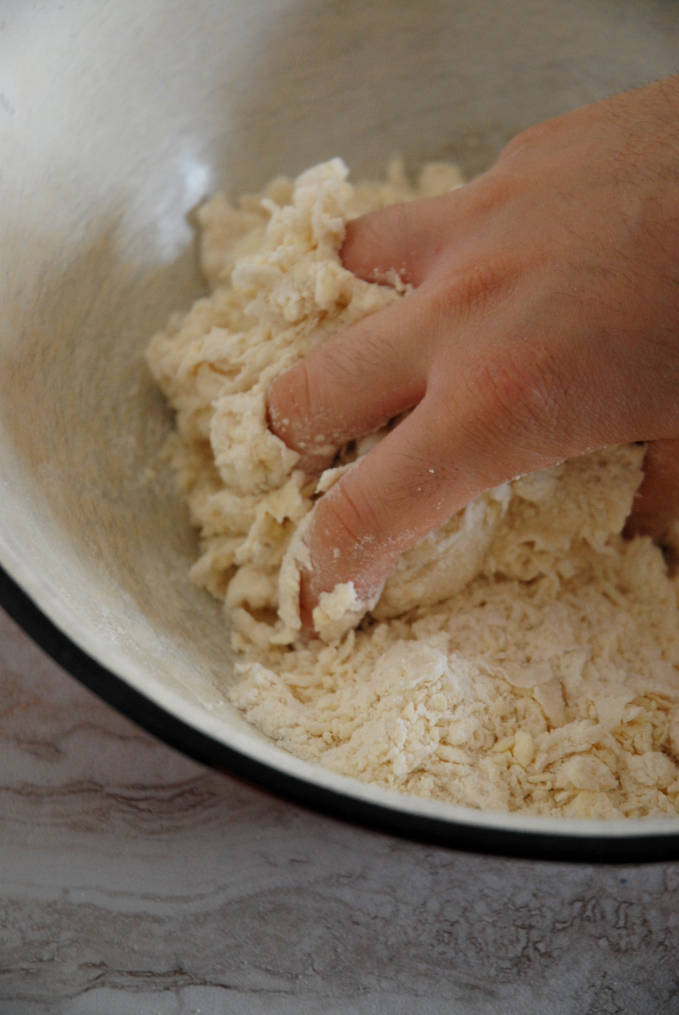
As Gordon Ramsay says, “mop up the water” with the flour until the dough sticks together only when you press it together. Do not add any extra water.
I then push the dough into a flat round, wrap it up with plastic wrap, and place it in the fridge to chill. Pushing the dough into a round helps it cool quicker than, say, if it were in a ball. Your dough should rest in the fridge for at least half an hour to let the gluten relax and the butter firm up. You can leave your dough at this stage in your fridge for up to a week, or in your freezer for a few months.
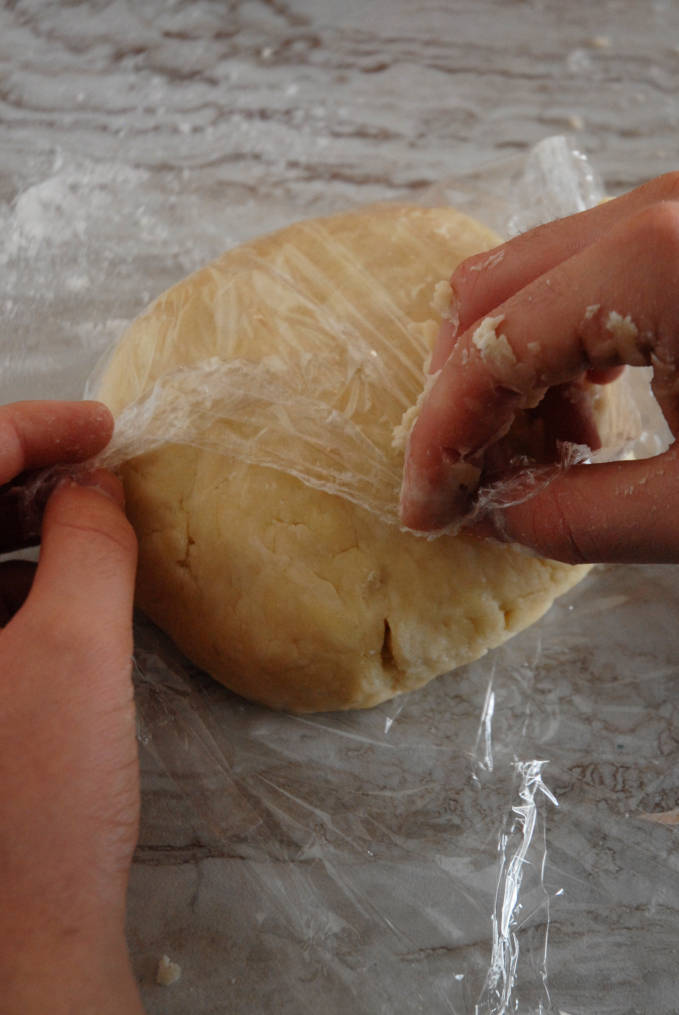
Once you take your dough out of the fridge, let it warm up a little bit if it is very hard. If you froze your dough, let it defrost overnight in the fridge.
When the dough softens slightly (not a lot, or else the butter will begin to melt) you can start rolling it out on a lightly floured work surface. Always roll out the dough from the center out, rather than back and forth, to prevent gluten formation. Give the dough a quarter turn every few rolls to prevent it from sticking to your work surface.
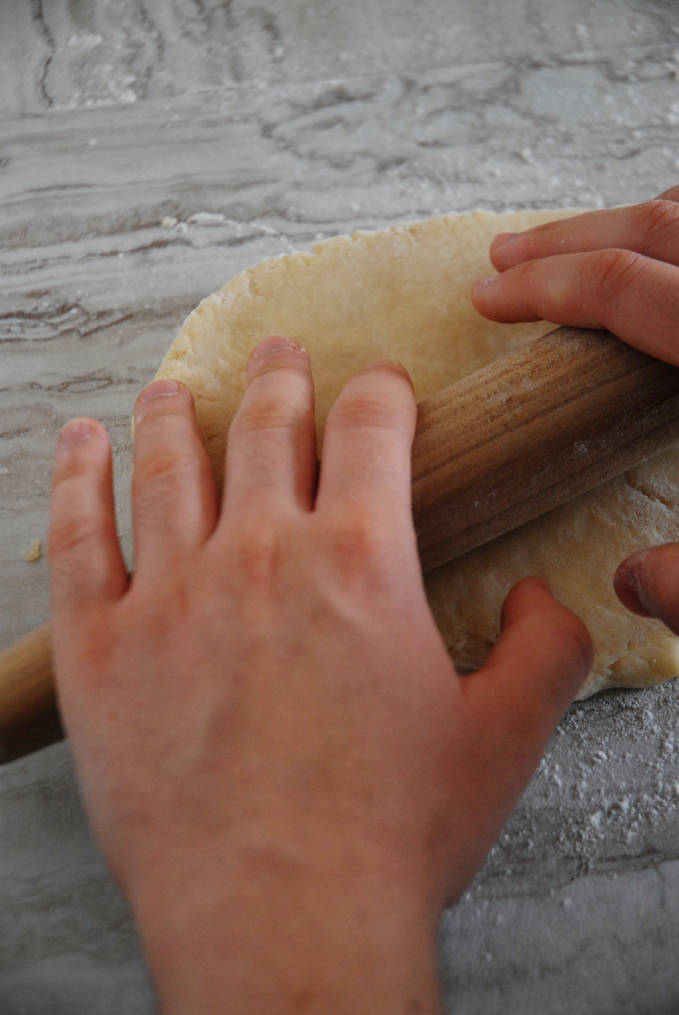
After I roll the dough out I like to wrap it loosely around my rolling pin. I then move the rolling pin to my ungreased pie pan or tart pan and unroll the dough on top.
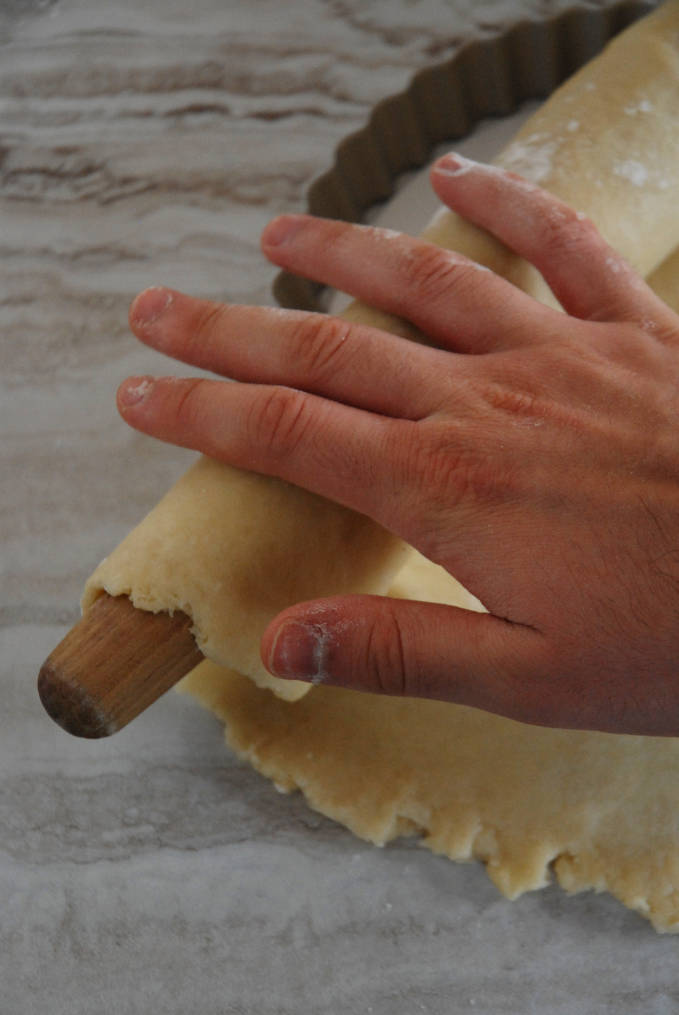
A common issue with tarts, which does affect double crusted pies, is dough shrinkage. In other words, after you bake the tart the sides of the tart become lower than they were originally. This can be a big problem, especially if your filling does not fit into your tart. This occurs because some water evaporates from the dough and the baked dough takes up less space. Fixing this problem is not difficult, however. The key is leaving some dough overhanging from the sides of the pan. I do not cut all the extra dough off from the tart shell before baking, but rather leave some. When the tart shell bakes, the dough shrinks. That is not a problem, however, because there was extra dough in the first place.
Not greasing your pan and using a non-non-stick (so, therefore, sticky) pan is also helpful because the dough hangs on better. No one really sells non-non-stick pans anymore though, so not greasing your pan is the best that you can do.
Be sure to press your dough to the pan with your fingers to ensure that your tart comes out tart-shaped, or your pie pie-shaped.
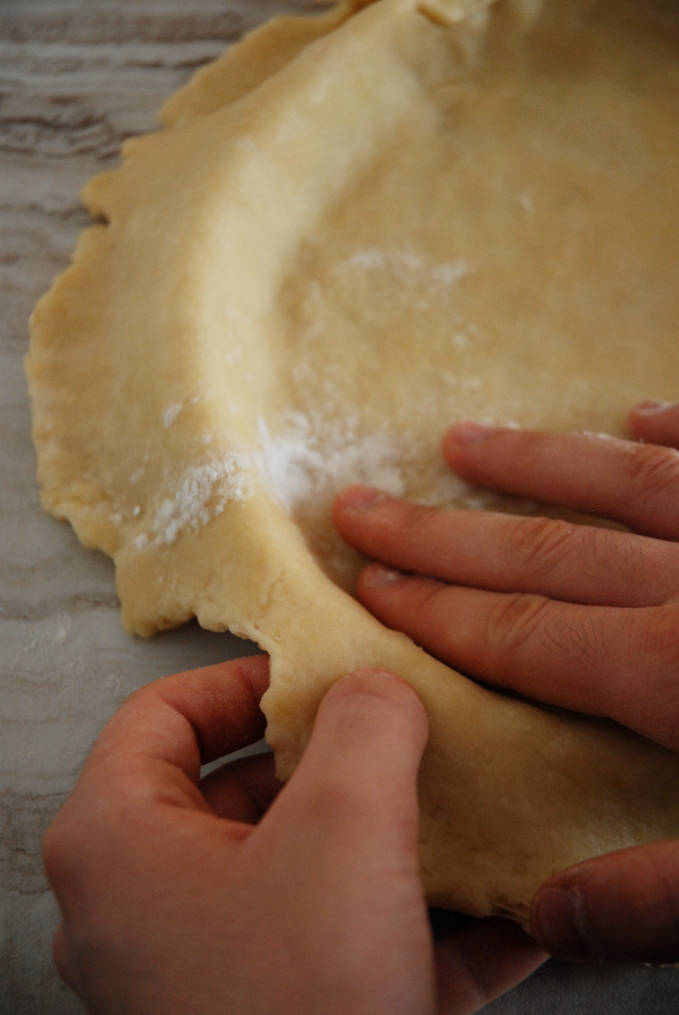
Take a fork and “dock” (i.e. poke holes in) the bottom of the dough so that large bubbles are unable to form and your tart surface remains smooth. Do not be scared of doing this if you are using a liquid filling since these holes should be too small for any filling to leak out anyway. Also, during baking, the holes shrink. If you are baking a double crusted pie this step is not necessary.
Place your crust (be it a pie crust or a tart crust) into the freezer for at least half an hour. Again, if you are baking a double crusted pie, this step is not necessary. Freezing the crust prior to baking helps reduce shrinkage as well. You can leave the crust in your freezer if you would like to whip up a great dessert on a whim.
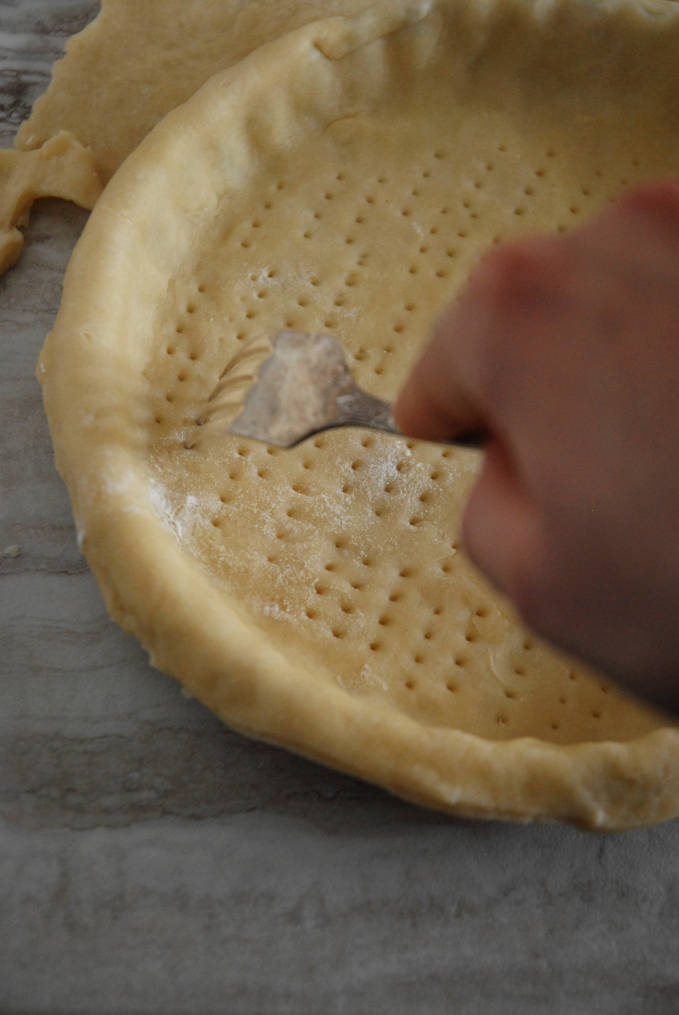
Once you take your crust out of the freezer you can either bake it with your favourite filling or blind-bake it without a filling . If you are using a filling, I suggest that you follow the instructions provided to you in your recipe.
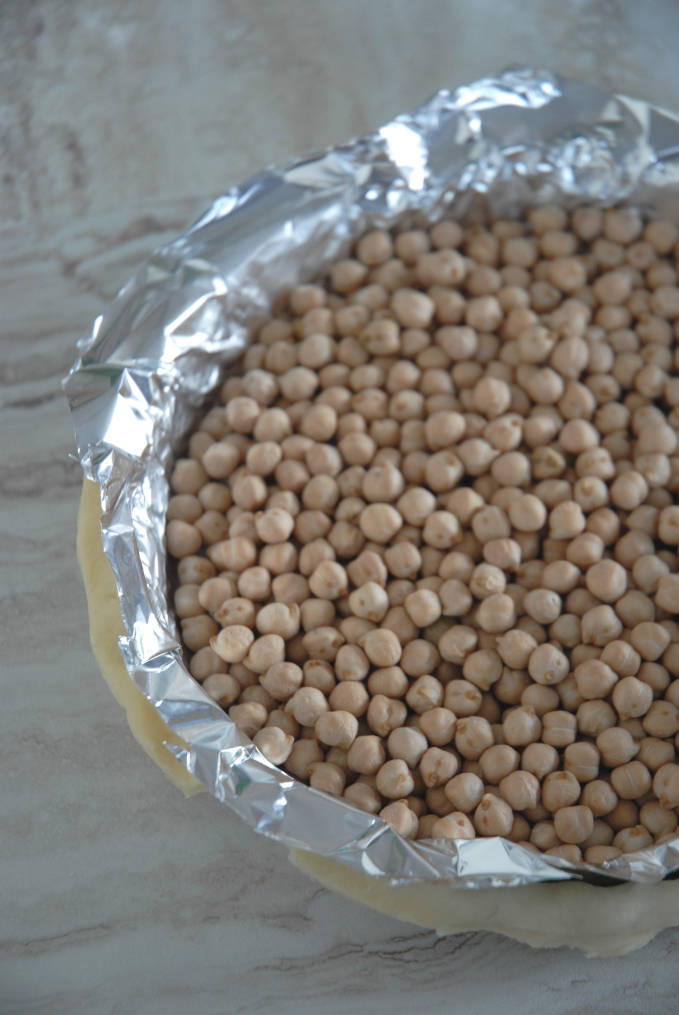
If you are blind baking the crust, place a layer of tinfoil over the dough and dump some type of bean or rice on top of the tinfoil. The idea behind using these “pie weights“, which frankly are perfect for tarts too, is to prevent any bubbles forming on the crust that would result in it baking unevenly. I bake the crust at 350°F for 15 minutes with the tinfoil and the beans, remove the tinfoil and the beans, and then bake until golden brown (about another 20 or so more minutes).
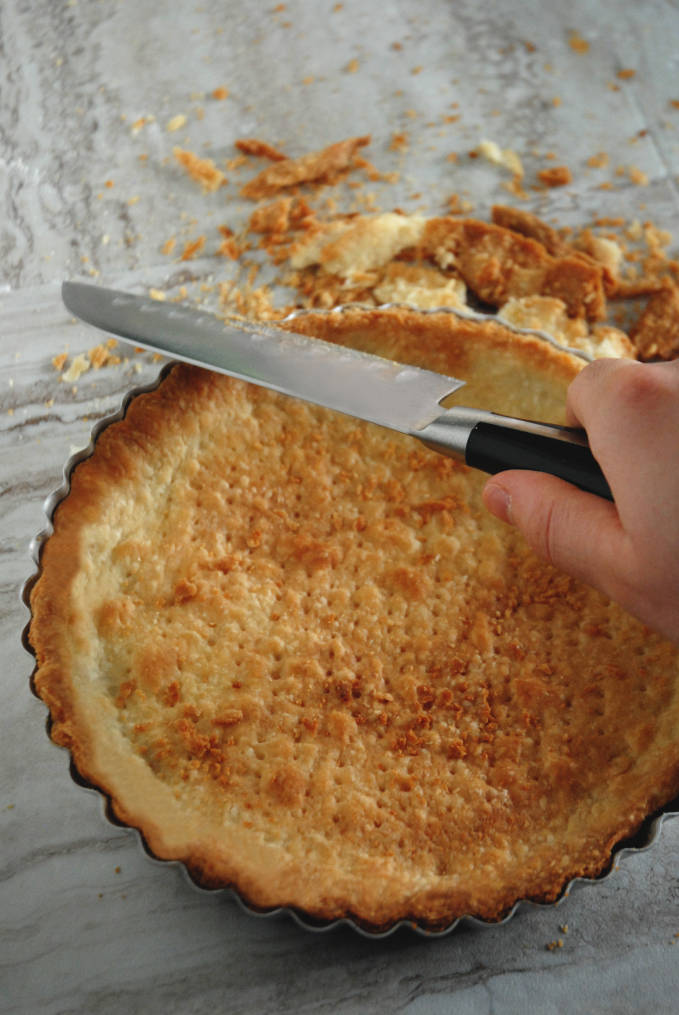
If you are making a tart or a single-crusted pie, once the crust comes out of the oven and is still hot use a sharp knife and cut off all the extra dough so that the crust is perfectly flat with pristine edges. Perfect.
Once the shell cools, I like to take a little tempered white chocolate and spread it over the bottom to create a barrier between crust and filling to prevent the crust from getting soggy. I find chocolate to be a much tastier alternative than an egg white, which is often used instead.
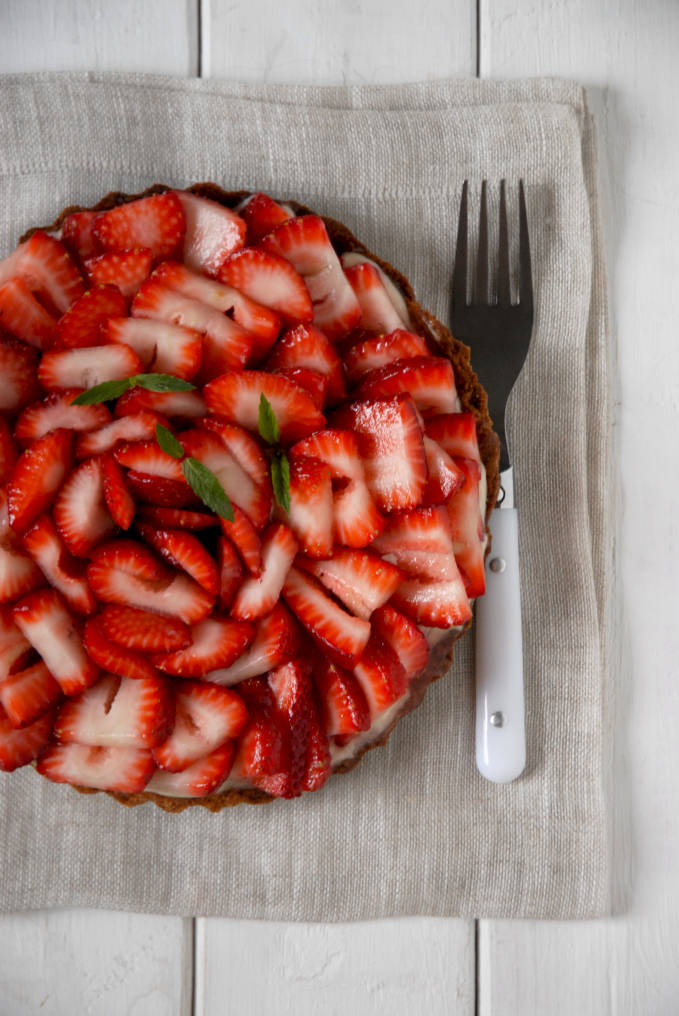
I filled this tart shell with vanilla pastry cream and strawberries. A slightly tart lemon glaze pulled all of the elements together.
I really hope this tutorial did not completely scare you off from shortcrust pastry. Making the actual pastry takes just a few minutes!
You may also be interested in my lattice pie crust step-by-step photo tutorial.
If you have any questions, feel free to ask in the comment section below.
Liked this tutorial? Read another one!
- 1 3/5 cups (200g) cold flour
- ¼ cup (50g) cold sugar
- pinch of salt
- scant ½ cup (100g) cold butter
- ~4 tablespoons (60ml) ice-cold water
- I strongly suggest you keep the full tutorial handy while making the dough since this recipe is just a very general overview of the tutorial. Firstly, combine the flour, sugar, and salt in a bowl. Add half of this mixture and half of the butter to a food processor and process until pea sized chunks of butter are visible. Dump this mixture into a new bowl. Process the other half of the flour mixture and butter until little flakes of butter are visible. Mix in with the already processed flour-butter mixture. Slowly pour in the cold water while "whisking" it in with your hand by lifting and pressing the dough rather than simply mixing or kneading it. You want to toss the dough around a little bit. Add only as much water as you need. When you press the dough it should come together. Press the dough into a round, wrap it in plastic wrap, and chill in the fridge for at least half an hour, or up to a week (even longer if you freeze the dough). Let the dough warm up a little bit so it can be rolled out (let defrost in the fridge overnight if you froze it). Roll out the dough on a lightly floured work surface by rolling from the center outwards rather than back and forth. Once the dough is rolled out, place it in your pie or tart pan.
- Cut off the extra dough but leave some dough around the edges to allow for shrinkage in the oven. Poke holes in bottom of the crust to prevent air bubbles forming while baking. Place the dough in the freezer for at least half an hour (or longer, if you wish). Remove the pan from the freezer and if blind-baking (baking without a filling) line with tin foil and place beans or rice on top to weigh the dough down so bubbles do not form during baking. Bake for 15 minutes at 350°F, remove the tinfoil and beans, and bake for about 20 minutes or until golden brown. If your filling needs to be baked, follow the instructions on your recipe.
- If you are baking a double crusted pie there is no need to freeze the dough. Place a single layer of dough in the pie plate, add the fruit, add the second layer of dough, crimp together, brush with an egg wash, and bake for at 350°F (baking time depends on the fruit you use, but around 30 minutes).
Ooooh I’ve never had shortcrust pie dough! It looks delicious!
This is a perfect recipe for the Summer – so refreshing, vibrant and colorful! And thank you for such a detailed tutorial – I know this post must’ve taken you a lot of time to compose!
Shortcrust pie dough?!?! Love it!
This is beautiful!
hi your recipes are true to its worth. thanks for sharing your true and tested recipes. I always love to visit your site. More power
Thank you so much, I really appreciate that :)
Hi, My shortcrust pastry always puffs up even when I bake it blind. I have tried to make little tartlets but they dont form crisp shells, rather puffy little things. Any tips please? Much appreciated. X
Hi Zaina! Place the dough in the freezer for half an hour before baking. That always helps.
Thank you will try that :-)
A-M-Azing! Seriously! I had a feeling i was reading a CSI investigation.. meaning- I really love your detailed, scientific approach that pretty much answers all the questions I could ever have about this topic.. once again – Amazing!
Now you make me have to go through the rest of your site..
I made a pastry with corn flour, custard powder sr flour and plain flour It tasted great It rolled well but when cooked was very crumbley What did I do wrong
Hi Colleen, it should be crumbly! That’s what properly made shortcrust pastry is like.
Where do I find the recipe for the Strawberry Tart?
Hi Jann, I don’t have it up here unfortunately. I made the tart shell as in this recipe, filled it with a regular pastry cream (use the one from this recipe), and then topped with cut up strawberries.
Hi Ilan,
After having the pastry in the fridge for 15 min, can you add your savoury/fruit filling and bake or do you have to bake blind first. |You site is amazing!!
Either way! You can blind bake first if you have a no-bake filling, or you can bake everything together if you need to bake the filling. Thanks :)
Why is shortcrust pastry crumbly?
Fat. Lots of it.
Hi llan,
I really love how you explain the reason behind everything and every step, and it helps me understand baking so much more. I think I will be learning a lot from you and your blog :)
That was a wonderful tutorial. You explained it so that it didn’t scare me. I know that making pie crust is very difficult and as you said, it take time and practice. I’m going to give it a try and I’ll let you know how I did. Thank you very much
Can I use this pastry (without sugar, of course) to make salty pies?
Wonderful tutorial, so enlightening.
The basic principles I learnt at school (uk) some 55yrs ago, from a northern England teacher who insisted us southerners couldn’t make good shortcrust. A bit prejudiced maybe.
But understanding the science really makes sense. I notice that shortening, ie. Cookeen, is only 100% veg. fats (tho tastes yuk). Whereas unsalted butter is only 82% fat, the other 18% being buttermilk I presume, in effect – water. Should I measure out more than 50% fat to flour, and add even less water?
Interesting! I’ve never experimented with that. Wish I could help.
Thanks for sharing with the basic principles behind. May I ask if we can use other fats such as oil instead of butter ? ( for vegetarian tart). Thank you
If you don’t have butter use vegetable shortening (e.g. Crisco). Oil won’t work as you need something that is solid.